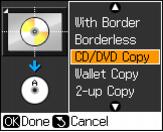
You can copy a printed photo, illustration, document, or CD/DVD label design directly onto an ink jet-printable 12-cm CD or DVD for a custom look. You can also check your design on plain paper first to see how the label will appear.
Note:
If you’re copying onto discs where the printable area extends to within 0.16 inch (4 mm) of the edge of the center hole, you may need to adjust the Inner setting on the Epson Stylus Photo RX595 Series control panel. See step 11 below.
If you’re copying onto discs where the printable area extends to within 0.16 inch (4 mm) of the edge of the center hole, you may need to adjust the Inner setting on the Epson Stylus Photo RX595 Series control panel. See step 11 below.
|
1.
|
|
2.
|
Press the
|
|
3.
|
Load your CD/DVD (or plain paper to check your design) into the Epson Stylus Photo RX595 Series.
|
|
4.
|
Place your original printed photo, illustration, or document, or your CD/DVD (label side down) on the scanner glass.
|
|
5.
|
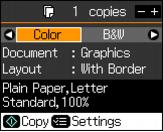
Press the Copy button to enter copy mode, if necessary.
|
|
6.
|
|
7.
|
|
8.
|
Press
|
Select Graphics for illustrations or Photo for photos. (Do not select Text when copying onto a CD/DVD.)
|
9.
|
Press
|
|
10.
|
Press OK.
|
|
11.
|
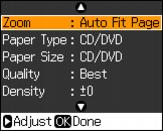
To copy a test label onto plain paper, or to adjust the position or ink density of the label, press  Menu. Select your settings, then press
  Start. (Zoom, Paper Size, and Quality are set automatically for CD/DVD printing.)
|
•
|
|
•
|
To adjust the ink density if ink smears on your printed CD/DVD, select Density and choose a lower density setting. Adjusting the ink density may be necessary for each brand of disc you use due to differences in ink absorption quality by disc manufacturers.
|
|
•
|
|
•
|
To adjust the position of the image on your discs, select CD Inner-Outer and adjust the distance from the center and edge of your discs.
|