![]()
Reference Guide
| Index | Search | Glossary | ||||||||
| Contents | Help |
|
||||||||
|
|
|
|||||||||||||||||||||||||||||||||
Printing with Macintosh
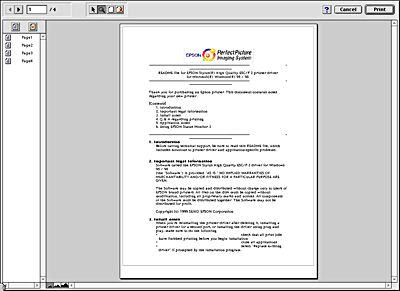
The Preview feature allows you to see how your document will look before actually printing it. Follow these steps to preview your document.
 | Make your printer driver settings. |
 |
Click the  Preview icon button in the Print dialog box. The Print button changes into a Preview button. Preview icon button in the Print dialog box. The Print button changes into a Preview button.
|
 | Note: |
Use the  Preview icon button to switch between the Preview icon button to switch between the  Print, Print,  Preview, and Preview, and  Save File modes. Click the icon to select the mode you want. For information on the Save File mode, see Saving spool data as a file. Save File modes. Click the icon to select the mode you want. For information on the Save File mode, see Saving spool data as a file.
|
 | Click the Preview button. The Preview dialog box appears and displays a preview of your document. |

The Preview dialog box contains six icon buttons you can use to perform the following functions.
 |
Selection |
Click this button to select, move, and resize watermarks. |
 |
Zoom |
Click this button to enlarge or reduce the size of the previewed page. |
 |
Margin Display/Non-Display |
Click this button to display or hide borderlines which indicate the printable area. |
 |
Watermark Editing |
Click this button to open the Watermark Edit box, where you can add watermarks to the document and change any of the current watermark settings. |
 |
Add Page |
Click these buttons to add or remove the highlighted pages from the list of pages to be printed. |
 |
Remove Page |
 | If you are satisfied with the previewed image, click Print. |
If you are not satisfied with the appearance of the image, click Cancel. The Preview and Print dialog boxes close with the current print settings preserved. Open the Print dialog box again to make additional changes to the print settings.
 Previous |
 Next |
| Version 1.00E, Copyright © 2001, SEIKO EPSON CORPORATION |