- Load 4 × 6-inch DURABrite Ink Glossy Photo Paper or Glossy Photo Paper into the sheet feeder.
- Start your photo program and open your photo file.
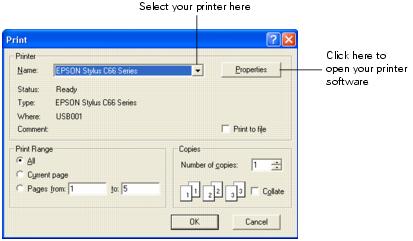
- From the File menu, click Print. You see a window like this one:
- Click the Properties or Preferences button. (If you see a Setup, Printer, or Options button, click it. Then click Properties or Preferences on the next screen.)
- Select the following in the printer settings window:
- Select Photo or Best Photo as the Quality Option setting.
- Select one of the following for the paper Types option, to match the paper you're using:
- Click the Borderless checkbox. Read the message and click OK.
- Select Portrait or Landscape as the orientation setting of your photo.
- Click OK.
- At the Print window, click OK or Print to start printing.
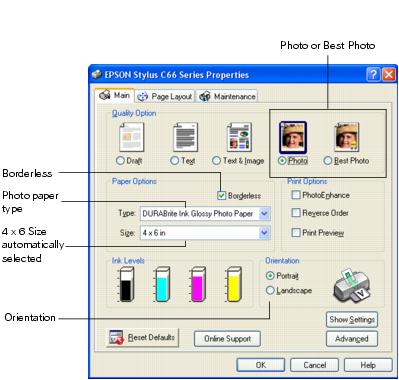
Your paper Size is set to 4 × 6 automatically.