|

Reference Guide
|
|
How To / Replacing Ink Cartridges
Before replacing ink cartridges, make sure the Stylus Scan is on. The operate light should be on and not flashing. Determine which ink cartridge needs to replaced by referring to the LCD Panel on the control panel.
 |
Make sure the Stylus Scan is on. The Operate light should be on.
|
 |
Refer to the panel message to determine which cartridge is low or empty.
|
 |
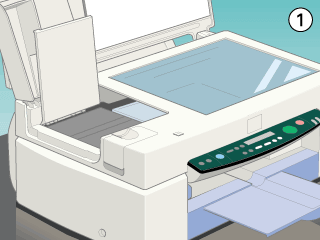
Open the document cover and maintenance cover.
|
 |
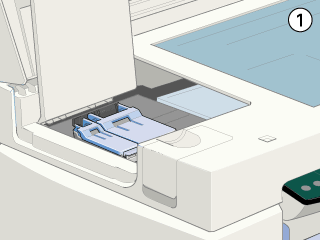
Hold down the  cleaning button for three seconds until the print head moves to the cartridge replacement position. The Operate light begins flashing. cleaning button for three seconds until the print head moves to the cartridge replacement position. The Operate light begins flashing.
|
 |  |
Caution:
|
| |
Do not move the print head by hand, as doing so may damage the mechanism.
|
|  |
Note:
|
| |
If you press the cleaning button for three seconds when the black and color ink out lights are off, the Stylus Scan starts cleaning the print head.
|
 |
Lift up the clamp that holds the cartridge as far as it will go. The cartridge rises partly out of the cartridge holder. Lift the cartridge out of the Stylus Scan and dispose of it properly. Do not take the used cartridge apart or try to refill it.
|
|  |
Warning:
|
| | -
If ink gets on your hands, wash them thoroughly with soap and water. If ink gets in your eyes, flush them immediately with water. If discomfort or vision problems continue after thorough flushing, see a doctor immediately.
|
| | -
Keep ink cartridges out of the reach of children. Do not allow children to drink the ink or otherwise handle the cartridges.
|
| |
Caution:
|
| |
Once you open the ink cartridge clamp, the ink cartridge becomes unusable and cannot be reinstalled, even if ink remains.
|
 |
Remove the new ink cartridge from its protective bag. Next, remove only the yellow tape seal from the cartridge.
|

| |
Caution:
|
| | -
You must remove the yellow tape seal from the cartridge before installing it. The cartridge will be permanently damaged if installed with the yellow tape attached.
|
| | -
Do not remove the blue portion of the tape seal from the top of the cartridge; otherwise, the print head may become clogged and unable to print.
|
| | -
Do not remove the tape seal from the bottom of the cartridge; otherwise, ink will leak.
|
 |
Place the ink cartridge gently into the cartridge holder with the label on the cartridge facing up. Then press the ink cartridge clamp down until it locks in place. Do not press down on the cartridge itself.
|

| |
Caution:
|
| |
Once you install the ink cartridges, do not open their clamps again until you are ready to replace the cartridges. Lifting the clamps makes the cartridges unusable.
|
 |
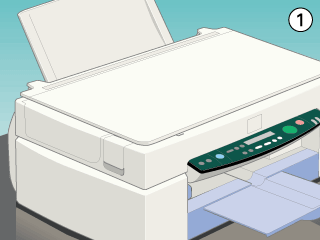
Close the maintenance cover and the document cover.
|
 |
Press the cleaning button. The Stylus Scan moves the print head and begins charging the ink delivery system. The Operate light flashes during ink charging. This process takes about one minute to complete. When the ink charging process is finished, the Stylus Scan returns the print head to the home position and the Operate light stops flashing.
|
| |
Caution:
|
| |
Never turn off the Stylus Scan while the Operate light is flashing. Doing so can result in incomplete charging of ink.
|

[Top]
| Version 1.00E, Copyright © 2001, SEIKO EPSON CORPORATION |

