You can
select or change wireless network settings using your product
control panel.
To install your product on a wireless network, follow the instructions on the Start Here sheet and install the necessary software from the product CD. The installer program guides you through network setup.
- Press
the
 home button, if
necessary.
home button, if
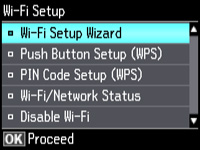
necessary. - Press the left arrow button to select Wi-Fi Setup and then press OK. You see this screen:
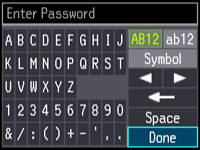
- Enter
your wireless password (or network name and then password).
- Press the arrow buttons to highlight a character or a function button displayed on the keypad. Then press the OK button to select it.
- To change the case of letters or select symbols, select AB12 (uppercase), ab12 (lowercase), or Symbol and press the OK button. Then highlight a number or symbol and press the OK button to select it.
- To enter a space, select Space and press the OK button.
- To delete characters, select the back arrow and press the OK button.
- When you finish entering characters, select Done and press the OK button.