You can
print one or more photos displayed on the LCD screen in special
layouts on various sizes of photo paper.
- Press
the
 home button, if
necessary.
 - Select More Functions.
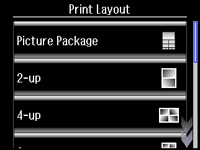
- Select Photo Layout Sheet. You see this screen:
- Scroll down to view all the options, then select the layout you want.
- Select Paper Size, then select the size that matches the paper you loaded.
- Select Paper Type, then select the type that matches the paper you loaded.
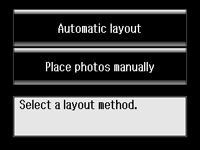
- Select Proceed. Depending on the layout you selected, you may see this screen:
- If you see the screen above, do one of the following:
- Select the photos you want to print.
- Press + or – to select one or more copies of each photo (up to 99).
- To select other photos for printing, scroll through your photos and repeat the selections above. Then select Proceed.
- To print more than one copy of the photo layout sheet, select + or – to set the number (up to 99). Then select Proceed.
- Select the print settings you want for your photo layout sheet.
- When you
are ready to print, press the
 Color button.
Note: To cancel printing, select Cancel.

