You can
change the default paper size for each source in Windows.
Do one
of the following:
Windows 7: Click and select
Devices and Printers. Right-click
your product name, and select Printer
properties.
Windows Vista: Click and select
Control Panel. Click Printer under Hardware
and Sound, right-click your product name, and select
Properties.
Windows XP: Click Start and select Printers and Faxes. (Or open the Control Panel, select Printers and Other Hardware if necessary, and
select Printers and Faxes.)
Right-click your product name and select Properties.
Click
the Optional Settings
tab.
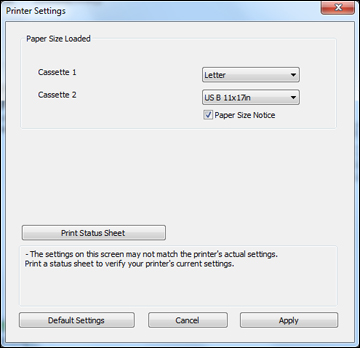
Click
Printer Settings. You see
this screen:
Select
the paper size you loaded in each paper source as the Paper Size Loaded. On the WF-7520, do one
of the following:
If you loaded
one of these paper sizes or a user-defined size in Cassette 1,
select Others as the Paper Size Loaded setting:
3.5 × 5 inches (89 × 127 mm),
11 × 14 inches
(279 × 356 mm), Envelope No. 10
(4.1 × 9.5 inches [105 × 241 mm]),
A6 (4.1 × 5.8 inches
[105 × 148 mm]), or Half Letter
(5.5 × 8.5 inches
[140 × 279 mm]).
If you
want the printer software to warn you if you try to print with the
wrong paper size, select the Paper Size
Notice checkbox.
Note: If you turn
on Paper Size Notice, your product
will prevent you from printing with the wrong paper size settings.
If you turn this option off and you try to print with the wrong
settings, your product will print even if the image size exceeds
the printable area, and your printout may be smudged.