After your
greeting card template is printed, you fill it out to create your
card and add your message.
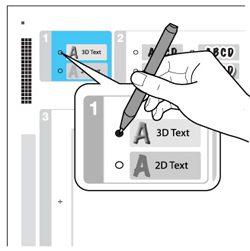
- Use a dark pen or pencil to fill in the circles and select the Text Style and Text Effects.
- Select
Print Greeting Cards from
Template. (If you don't see the option, press the
 home button and select
More Functions >
Greeting Card >
Print Greeting Cards from
Template.)
home button and select
More Functions >
Greeting Card >
Print Greeting Cards from
Template.) - When you
are ready to print, press the
 start button.
Note: To cancel printing, select Cancel.
start button.
Note: To cancel printing, select Cancel.