You
can use the projector's Point Correction feature to adjust the
image via points on a grid. This is useful to adjust
overlapping areas in multiple projections that do not line up
correctly.

-
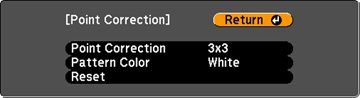
Select the Point Correction
setting and press Enter.
Note: If you see a confirmation message to continue, press Enter again.You see this screen:
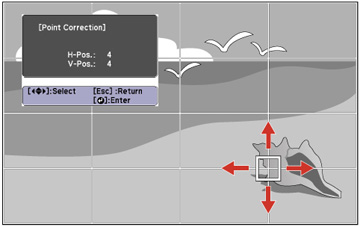
- Use the arrow buttons on the projector or remote control to move to the point on the grid that you want to adjust. Then press Enter. The box will change from a single line to a double-lined square.
-
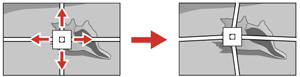
Use the arrow buttons to correct the distortion in all
necessary directions.
Note: You can press Enter to show or hide the image and grid to check the results.