Printing Without a Computer
PictureMate lets you print photos quickly and easily without a computer. Just insert your digital camera's memory card, choose settings from the control panel, and press Print.
For details, see these sections:
Note: If you have a camera that supports the PictBridge standard, you can connect the camera's USB cable directly to PictureMate and control printing from your camera. See Printing From a Digital Camera.
Compatible Memory Cards
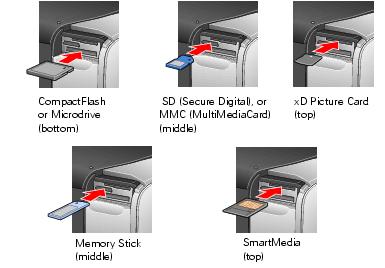
You can insert any of these types of memory cards into PictureMate:
- CompactFlash Type I and II
- Microdrive
- SD (Secure Digital)
- miniSD (requires miniSD adapter)
- MMC (MultiMediaCard)
- xD Picture Card
- Sony Memory Stick
- Memory Stick Duo (requires Memory Stick Duo Adapter)
- Memory Stick PRO
- Memory Stick PRO Duo (requires Memory Stick Duo Adapter)
- MagicGate Memory Stick
- MagicGate Memory Stick Duo (requires Memory Stick Duo Adapter)
- SmartMedia
Photo Image File Requirements
Make sure the photo image files on your memory card meet these requirements:
- JPEG files or uncompressed Tiff files only
- Resolutions ranging from 120 × 120 to 4600 × 4600 pixels
Your PictureMate recognizes and prints the first 999 photos on your memory card.
Note: PictureMate supports P.I.M. (PRINT Image Matching) and Exif Print image enhancement features. See your camera manual to see if these features are included on your camera. PictureMate does not support progressive-scan JPEG or RAW images.
Most digital cameras create JPEG files. See your digital camera manual for details.
Inserting Your Memory Card
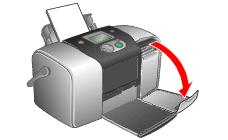
- Make sure PictureMate is on, then flip down the memory card door.
- Insert the memory card into its slot, as shown.
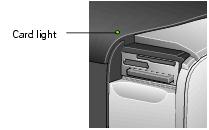
- Push the card in until it stops (it won't go in all the way). When the card is in, the card light comes on.
- Close the memory card door.
Note: Insert just one card at a time. PictureMate can't read multiple cards at once.
Removing Your Memory Card
To remove a card, pull it straight out of the PictureMate slot.
Caution: Do not remove a card while the card light is flashing, or you may lose data on the card.
Printing a Proof Sheet With the PictureMate Wizard
A proof sheet shows small, thumbnail images of all the photos on your memory card. The proof sheet shows the photo numbers you will need when choosing photos for printing. (The numbers might not match the numbers that you see in your camera.)
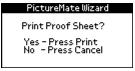
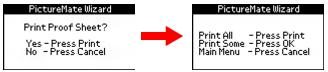
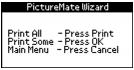
When you insert the memory card, you see the PictureMate Wizard with this message:
Note: If you don't see the PictureMate Wizard, remove and reinsert your memory card. If it still does not appear, see Turning the PictureMate Wizard Off or On for instructions on turning it on. If you see DPOF at the top of the screen instead, see Camera-selected DPOF Photos.
Tip: If you have a large number of photos on your memory card and you want to print a proof sheet with some photos instead of all of them, see Selecting the Photos You Want to Print to choose photos, then see Choosing a Layout to select the Proof Sheet layout.
- Press
 Print to print your proof sheet.
Press Cancel if you have already printed a proof sheet for the photos currently on your card or if you want to print all your photos and don't need to see a proof sheet.
(To make sure you know which photos are on your card, you should print a proof sheet if you have taken new photos or deleted photos since the last time you inserted your card in PictureMate.)
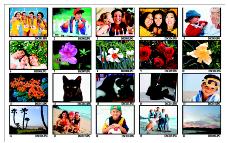
Note: Your proof sheet includes up to 20 photos per sheet. It might print on several sheets of paper, depending on the number of photos on your card.
Printing All Your Photos From the PictureMate Wizard
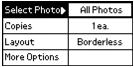
After you print the proof sheet or cancel it, you see this screen:
Press
Print to start printing all your photos.
Note: If your card has more than 20 photos, you will need to reload paper while printing. Load a maximum of 20 sheets at a time. When you see the message "Try loading paper again," load more paper and press OK to continue printing. If you need to cancel printing, press Cancel.
When printing is complete, you see the Main Menu. To learn more about the Main Menu, see Viewing the PictureMate Main Menu.
Tip: To start the PictureMate Wizard again, remove and re-insert your card (see Inserting Your Memory Card).
Printing Some of Your Photos With the PictureMate Wizard
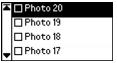
After you print a proof sheet or cancel it, you see this screen:
- Press OK to print some of your photos.
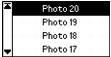
- Press
 or
or  to highlight the number of the photo you want to print (use the proof sheet to find photo numbers), then press OK to choose it.
Tip: Hold down
or
to scroll quickly.
- Press
or
to choose the number of copies to print for that photo (up to 10), then press OK.

- Repeat steps 2 and 3 for each additional photo you want to print.
The screen shows the selected photos and the number of copies for each. (You may need to press
or
to scroll and see all your selected photos.)
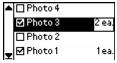
If you chose the wrong photo, you can deselect it. Highlight the selected photo and press OK to uncheck it. If you need to change the number of copies, press OK twice and change the number as described in step 3.
- When you're done selecting photos, press
Print.
You see this screen:
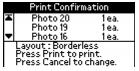
- Confirm your photo selections (press
or
to scroll and see all your selected photos), then press
Print again to start printing.
Note: If the print confirmation is off, you will not see the screen above and only need to press
Print once. (See Turning Print Confirmation Off or On for details.)
Load a maximum of 20 sheets at a time. If you print more than 20 photos, PictureMate will prompt you to reload paper while printing. When you see the message "Try loading paper again," load more paper and press OK to continue printing. If you need to cancel printing, press Cancel.
When printing is complete, you see the Main Menu. To learn more about the Main Menu, see Viewing the PictureMate Main Menu.
Tip: To start the PictureMate Wizard again, remove and re-insert your card, (see Inserting Your Memory Card).
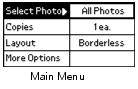
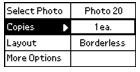
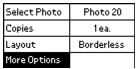
Viewing the PictureMate Main Menu
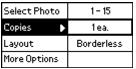
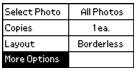
PictureMate's Main Menu offers flexibility in choosing the photos you want and how to print them. For example, you can choose page layouts such as wallet photos or photos with borders.
Tip: You can also crop your photos, print in black and white or sepia, or add the time or date. (See Doing More With Your Prints.)
If you see the PictureMate Wizard, press Cancel twice. The Main Menu appears, as shown above.
You will also see the Main Menu after you finish printing from the PictureMate Wizard.
When no card is inserted in PictureMate, you see the Main Menu.
Tip: To turn off the PictureMate Wizard and see the Main Menu only, see Turning the PictureMate Wizard Off or On.
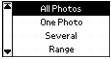
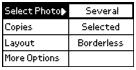
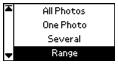
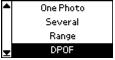
Selecting the Photos You Want to Print
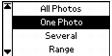
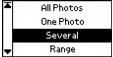
The Select Photo option on PictureMate lets you decide how to choose photos to print:
Make sure your memory card is inserted in PictureMate and you see the Main Menu, then follow the steps in the appropriate section:
|
|
All Photos: print all the photos on your card
|
|
|
One Photo: print just one photo
|
|
|
Several Photos: select several photos by number
|
|
|
Range of Photos: choose a sequence of photos (for example, photos 7 through 12) on your card
|
|
|
Camera-selected DPOF Photos: print a set of photos that you pre-selected in your digital camera using DPOF (appears by default and is available only when photos have been selected with DPOF)
|
All Photos
One Photo
Several Photos
Range of Photos
A range of photos is a sequence of photos (for example, photos 7 through 12). Choosing a range is convenient because you don't have to choose each individual photo. Look at the photo numbers on your proof sheet to determine the first and last numbers in the range, then follow these steps:
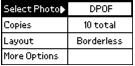
Camera-selected DPOF Photos
If your camera supports DPOF (Digital Print Order Format), you can use it to pre-select which photos you want to print and how many copies.
See your camera's manual to choose photos for printing with DPOF, then insert your memory card in PictureMate. PictureMate automatically reads which photos you have selected and how many copies to print for each one.
If you have chosen photos from your camera, DPOF is selected as the Select Photo option by default.
Just press
Print to print your DPOF photos.
If DPOF is selected and you want to choose other photos to print, press
or
to highlight Select Photo, press OK, and choose a different option.
If DPOF has been deselected and you want to select it again, follow these steps:
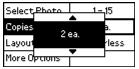
Setting the Number of Copies in the Main Menu
You can print from 1 to 100 copies. Keep in mind that if you are printing all photos or a range of photos, the number of copies applies to every photo.
Note: If you are printing Several photos, you already chose the number of copies for each photo, so you can't change the Copies setting from the Main Menu. You can choose up to 10 copies per photo when printing Several.
If you are printing DPOF photos, the number of copies is selected from your camera and you can't change the Copies setting.
Choosing a Layout
- On the Main Menu, press
or
to choose Layout, then press OK.
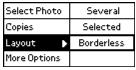
- Press
or
to highlight the layout setting you want for your photo(s), then press OK.
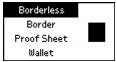
You have four choices:

Borderless

Border

Proof Sheet

Wallet
Confirming and Printing
Once you have selected all the basic print settings, you are ready to print.
Before printing, you may want to select other options for your photos. See Doing More With Your Prints for details.
PictureMate retains the settings you made after it is done printing. You can reset your PictureMate to its original default settings; see Resetting the Factory Default Preferences.
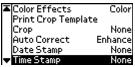
Doing More With Your Prints
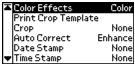
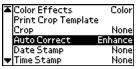
After you have made the basic print settings, you can use these additional settings to refine your print(s):
All of these features are available under More Options on PictureMate's Main Menu.
Note: The features described in this section do not change or replace the original digital photo file; they customize only the print(s) that you make at that one time. These settings do not appear in the Print Confirmation screen.
Printing Photos in Black and White or Sepia
You can print your photo in black and white or sepia tone, without changing the original photo.
Note: A sepia print has a brownish tone, for an old-fashioned photo look.
Cropping Your Photo
If you want to print only part of a photo, you can crop it to leave out the part you don't want. Choose one photo to crop at a time. (See One Photo to choose One Photo from the Main Menu.) First you will print a template sheet for the photo showing different cropping areas; then you will select the one you want to print from that template. If you already have a reference template for a photo with the same orientation, you can skip to step 5.
- On the Main Menu, press
or
to highlight More Options, then press OK.
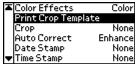
- Press
or
to highlight Print Crop Template, then press OK.
- Press
Print to print the template.
Tip: The crop areas do not change, so you can print the template once and use it as a reference for all your photos.
Your photo prints with a preview of the different cropping areas.
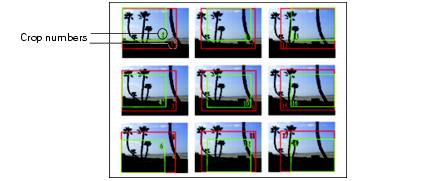
- Choose the number for the area you want to print.
- Press
or
to highlight Crop, then press OK.
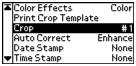
- Press
or
to select the crop number you chose from the template, then press OK.

- Confirm the crop number you have selected.
Note: This setting remains in effect for all photos until you press and hold Cancel for 3 seconds or turn your PictureMate off.
Automatically Fixing Photo Appearance
Your PictureMate can automatically enhance or fix the appearance of your prints.
- On the Main Menu, press
or
to highlight More Options, then press OK.
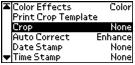
- Press
or
to highlight Auto Correct, then press OK.
- Press
or
to choose one of the settings.
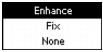
- Enhance: automatically adjusts photos using P.I.M. or Exif Print features in your digital photos (see your camera manual to see if it supports these features). This option is automatically selected if your photo contains P.I.M. or Exif Print information.
- Fix: use this setting if the photo you printed looks bad; corrects images that are too dark or too bright.
- None: turns off enhancements (default setting when the photo has no P.I.M. or Exif Print information).
- Press OK.
Note: This setting remains in effect for all photos until you press and hold Cancel for 3 seconds or turn your PictureMate off.
Adding the Date or Time
You can add the date and/or time your picture was originally taken to your photo when you print.
- On the Main Menu, press
or
to highlight More Options, then press OK.
- To print the date, press
or
to highlight Date Stamp, then press OK.
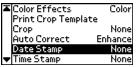
- Press
or
to choose one of the settings:

- None (default; turns off the date stamp)
- yyyy.mmm.dd (2005.May.09)
- mmm.dd.yyyy (May.09.2005)
- dd.mmm.yyyy (09.May.2005)
- Press OK.
- To print the time, press
or
to highlight Time Stamp, then press OK.
- Press
or
to choose one of the settings:

- Press OK.
Note: This setting remains in effect for all photos until you press and hold Cancel for 3 seconds or turn your PictureMate off.
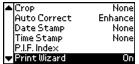
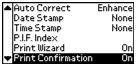
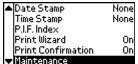
Setting PictureMate Preferences
You can adjust these settings on your PictureMate:
Resetting the Factory Default Preferences
You can reset the PictureMate preferences (Print Wizard, Print Confirmation, and LCD Contrast settings) to the original, factory default settings.
- Press and hold Cancel for 3 seconds.
You see this screen:
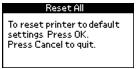
- Press OK to reset all the print settings.
Turning the PictureMate Wizard Off or On
When you first insert a memory card, the PictureMate Wizard guides you to print a proof sheet, then to print some or all of your photos.
You can turn this feature off and print directly from the Main Menu all the time, or if you turned the PictureMate Wizard off and you want to use it, you can turn it back on.
Note: If you usually print all the photos on your memory card, turn off the PictureMate Wizard. Then whenever you insert your memory card, you can print all your photos by just pressing
Print.
Turning Print Confirmation Off or On
The Print Confirmation screen lets you make one last check of your photo selections before you print. You can turn this feature off (or back on).
When the Print Confirmation is On, you see a screen like this that lets you check settings before printing:
When the Print Confirmation is Off, the printer prints without a final confirmation screen.
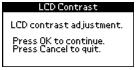
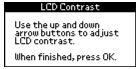
Adjusting the LCD Screen Contrast