|

Reference Guide
|
|
How to / Setting Up Your Printer on a Network
For Macintosh Users
 Setting up your printer as a shared printer
 Accessing the printer through a network
This section tells you how to set up the printer so that you can use it on an AppleTalk network. By setting up your printer as a shared printer, your local printer is connected to the network and can be used by other computers.
 |
Note:
|
 | |
This feature is not available with Mac OS X.
|
|
First, you need to set up the printer as a shared printer on the computer to which the printer is connected. Next, specify the network path to the printer from each computer that will use it, and install the printer software on those computers.
Setting up your printer as a shared printer
To share a printer with other computers on an AppleTalk network, follow the steps below to configure the computer the printer is connected to.
 |
Turn on the printer.
|
 |
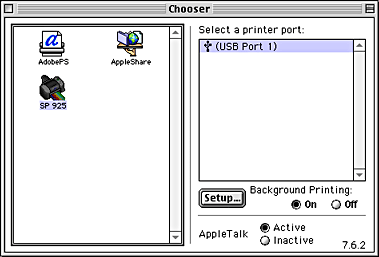
Choose Chooser from the Apple menu and click the icon for your printer, then, select the port the printer is connected to.
|

 |
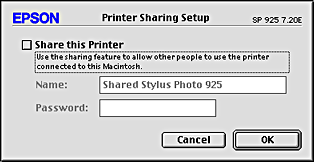
Click the Setup button. The Printer Sharing Setup dialog box will open.
|

 |
Select the Share this Printer check box, then type the printer name and password information as necessary.
|
 |
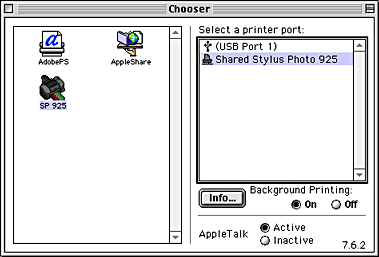
Click OK. The name of the shared printer will appear in the port list in the Chooser.
|
 |
Close the Chooser.
|

[Top]
Accessing the printer through a network
To access your printer from other computers on a network, follow the steps in this section for each computer that will access the printer.
 |
Turn on your printer.
|
 |
Install the printer software from the printer software CD-ROM.
|
 |
Choose Chooser from the Apple menu. Click the appropriate printer icon and select the printer port that you want to use from the Select a printer port list.
|
 |  |
Note:
|
 |  | |
Only printers that are connected to your current AppleTalk zone are available.
|
|

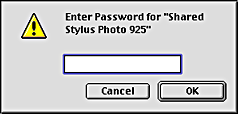
If the following dialog box appears, enter the password for the printer, then click OK.

 |
Select the appropriate Background Printing radio button to turn background printing on or off.
|
 |
Close the Chooser.
|

[Top]
For Macintosh OS X 10.2 Users
 Setting up your printer as a shared printer
 Using a shared printer
This section tells you how to set up your printer so that other computers on the network can use it.
 |
Note:
|
 | |
Printer sharing is not supported by Mac OS X 10.1.
|
|
 | |
This section is written for small networks only. If you are on a large network and would like to share your printer, consult your network administrator.
|
|
Setting up your printer as a shared printer
When you turn on printer sharing, you share all printers in your Print Center Printer List, whether they are connected directly to your computer or to your network.
Follow the steps below to set up your printer to share with other computers on the network:
 |
Turn on the printer.
|
 |
Double-click the Sharing folder in System Preferences.
|
 |
Click Printer Sharing on the Services tab. If necessary, click Start.
|
 |
Open Print Center, select your printer, and select Show Info from the Printers menu.
|
 |
Enter a descriptor in the Location box (for example, Marketing) that will help other network users identify the printer.
|
 |
Click Apply Changes. Then close the Printer Info dialog box and Print Center.
|
Using a shared printer
Follow the steps below for each computer that will access the printer on the network:
 |
Turn on the printer.
|
 |
Install the printer software from the printer software CD-ROM.
|
 |
Select the printer in the Print dialog box.
|
 |
Note:
|
 | |
To find the printer's location, open Print Center, select the printer, and select Show Info from the Printers menu. If you don't see any shared printers in the Print dialog box or Print Center, select Preferences from the Print Center menu. Then click Show printers connected to other computers.
|
|
| Version 1.00E, Copyright © 2001, SEIKO EPSON CORPORATION |
![]()
Setting up your printer as a shared printer
Accessing the printer through a network


 Setting up your printer as a shared printer
 Using a shared printer


