You can print your photos with no margins, extending the image all the way to the edges of the page. Although borderless printing is a bit slower, you get beautiful snapshots and enlargements, without trimming.
See the section on Loading Paper, then see these sections for instructions on printing borderless photos:
You can print borderless photos on these papers and sizes:
With proper care, photographs from your Epson Stylus printer will last for many years. The special Epson DURABrite inks designed for your printer are formulated to achieve improved lightfastness when used with Epson papers for prints that are properly displayed or stored. For best results, always use Epson papers.
As with traditional photos, Epson recommends proper care that will minimize color changes and lengthen display life:
To order Epson paper, contact your dealer or call the Epson Store at (800) 873-7766 or visit our web site at www.epsonstore.com (U.S. sales only). In Canada please call (800) 463-7766 for dealer referral.
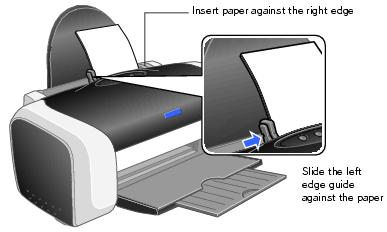
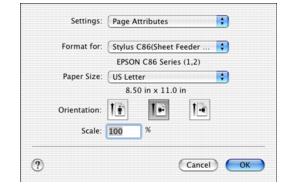
Load paper as shown:
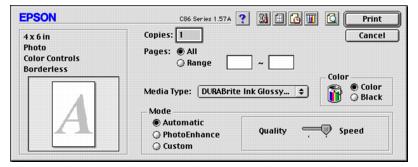
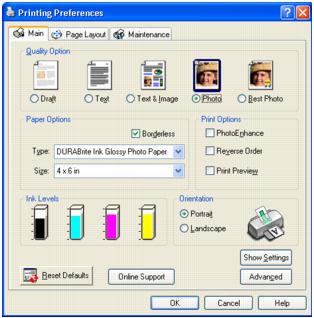
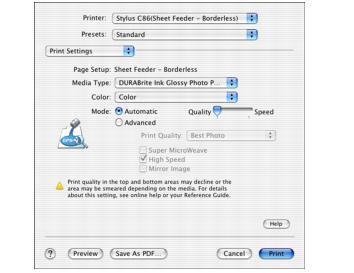
You see a window like this one:
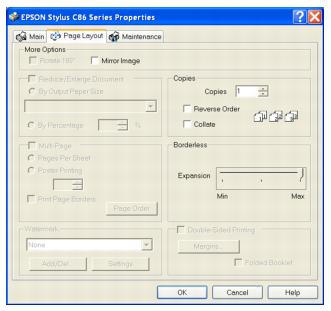
Min retains the entire image in your print, but there may be a small white edge on the borders of the print. Max expands the image to ensure that there are no unprinted edges, but the edges of the image may not appear in the print.
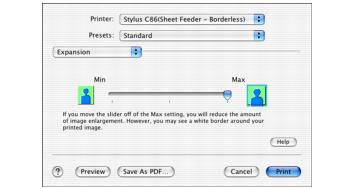
Min retains the entire image in your print, but there may be a small white edge on the borders of the print. Max expands the image to ensure that there are no unprinted edges, but the edges of the image may not appear in the print.

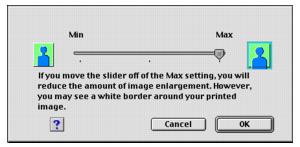
Min retains the entire image in your print, but there may be a small white edge on the borders of the print. Max expands the image to ensure that there are no unprinted edges, but the edges of the image may not appear in the print. Then click OK.