If
you installed the optional short throw lens (ELPLU02)
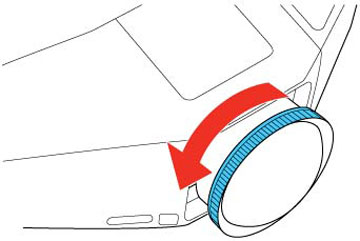
and shifted the lens using the lens shift option, you can focus the
image using the distortion ring.
Note: When using
the short throw lens, select ELPLU02
as the Lens Type setting in the
Extended menu. If the image has shifted after making adjustments,
re-position the image using the Lens
Shift button. When adjusting the image height, position the
image lower than where you want it to be and move it up using the
arrow buttons. This will help prevent the image from moving down
after adjustment.
-
Carefully rotate the distortion ring all the way
counterclockwise.
Note: Be careful not to move the short throw lens when adjusting it to prevent the projected image from shifting.
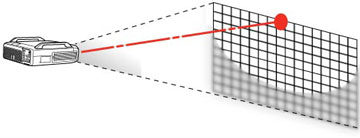
- Press and hold the arrow buttons to focus the image around the center of the lens.
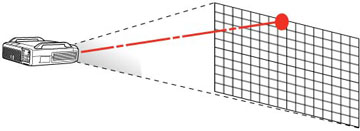
- Rotate the distortion ring until the area around the edges of the image is also focused.