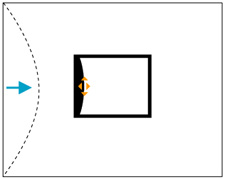
Correcting Image Shape with Curved Surface

You can use the projector's Curved Surface setting to adjust the shape of an image projected on a curved surface.


Note: For the best results, keep the lens centered using lens shift. The image may not be evenly focused throughout even after performing the steps here.
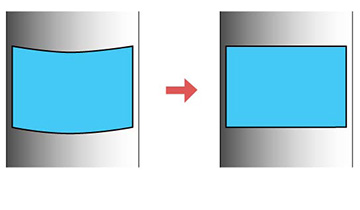
  1. Turn on the projector and display an image.
    Note: You can display a pattern to aid in adjusting the projected image using the Settings menu.
  2. Press the Menu button.
  3. Select the Settings menu and press Enter.


  4. Select the Geometric Correction setting and press Enter.
  5. Select the Curved Surface setting and press Enter.
    Note: If you see a confirmation message, press Enter.
    You see this screen:


  6. Select the Correct Shape setting and press Enter.
  7. Use the arrow buttons on the projector or the remote control to select the area you want to adjust. Then press Enter.


    Note: To reset your adjustments, press the Esc button for at least 2 seconds to display a reset screen, and select Yes.
  8. Use the arrow buttons on the projector to adjust the image shape.


    Note: If the adjustment triangle turns gray, you cannot adjust the shape any further in that direction.
  9. Press the Esc button to return to the Curved Surface menu screen.
  10. Repeat the previous three steps as necessary to adjust other image areas. If the image expands or contracts, continue with the next step to adjust the linearity.
  11. Select one of the following from the Curved Surface menu screen:
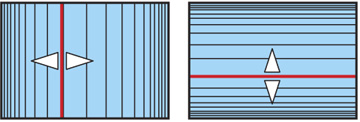
    • Horizontal Linearity: Adjusts horizontal expansion or contraction.
    • Vertical Linearity: Adjusts vertical expansion or contraction.
  12. Select a displayed line to use as a baseline and press Enter. The selected baseline flashes red and white.
  13. Adjust the linearity by doing one of the following:
    • Press the left arrow button to contract the distance between the lines closest to the baseline.


    • Press the right arrow button to expand the distance between the lines closest to the baseline.


  14. When you are finished, press Menu.
Note: If necessary, you can fine-tune the results of your Curved Surface adjustments using Point Correction.
Related tasks
Displaying a Test Pattern
Correcting Image Shape with Point Correction
Related references
Projector Feature Settings - Settings Menu