You can load
13-inch (329 mm, A3+) wide roll paper for printing large or
panoramic images, or multiple photos (with or without borders).
Note: It’s a
good idea to check the ink status and replace cartridges, if
necessary, before printing a large print job. If you need to
replace a cartridge during printing, you can continue to print but
you might notice a color difference in your printout depending on
drying conditions.
- Turn on your product.
- Remove any paper from the sheet feeder and close the paper support.
- Remove the rear manual feed guide, if installed.
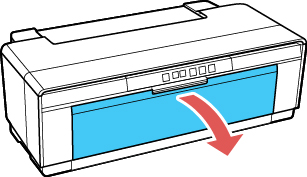
- Open the front cover.
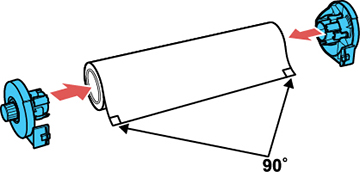
- Remove any tape and protective paper from the end of the
paper roll. Make sure the paper is cut straight across to avoid
paper feeding problems.
Note: Avoid touching the surface of your paper. With canvas media that you have previously loaded, cut the edge straight each time you reload it for best results.
- Place the roll paper holders on each end of the paper roll as shown.
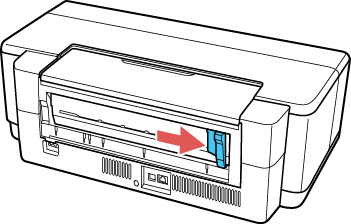
- Move the roll paper edge guide all the way to the right.
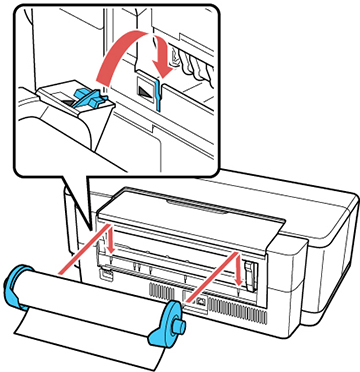
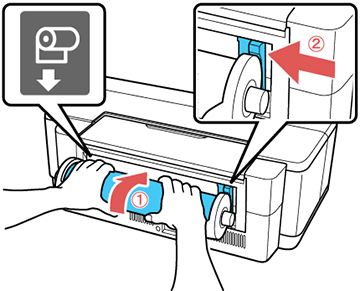
- Attach the roll paper holders as shown. Hook the holders
onto the attachment points marked with orange arrows.
Note: Make sure the roll paper is oriented so that the paper is fed over the top of the roll as shown.
- Feed the paper into the roll paper feeder (marked with the icon shown) until it meets resistance. Move the roll paper edge guide to the edge of the paper. In a few seconds, the paper loads automatically.
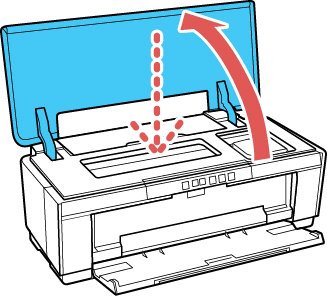
- Open the printer cover and make sure that the paper is aligned correctly. If the edge feeds at an angle, remove the roll paper and load it again. Make sure the edge is cut at a 90° angle.