- Load paper in this size in your product: 4 × 6 inches (102 × 152 mm).
- Press the
 home button, if
necessary.
home button, if
necessary. - Press the arrow buttons to select Setup and press the OK button.
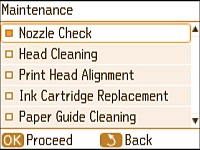
- Select Maintenance and press the OK button.
- Select Nozzle Check and press the OK button.
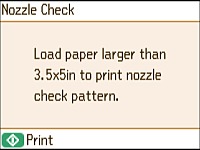
- Press the
 start button. The nozzle
check pattern is printed.
start button. The nozzle
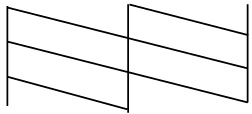
check pattern is printed. - Check the printed pattern to see if there are gaps in the
lines.
Print head is clean
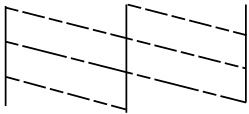
Print head needs cleaning
- Do one of the following:
- If there are no gaps, the print head is clean. Select Finish Nozzle Check and press the OK button.
- If there are gaps or the pattern is faint, select Head Cleaning and press the OK button. Follow the instructions on the screen to clean the print head, check the nozzles, and repeat the process as necessary.