You
can use the projector's Corner Wall setting to adjust the shape of
an image projected on a surface with right angles, such as a
rectangular pillar or the corner of a room.
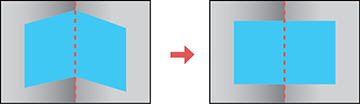
Note: For the
best results, project from the front of the screen onto a
right-angled surface. The image may not be evenly focused
throughout even after performing the steps here. If you see a 4K
Enhancement message, select Yes
to disable the 4K Enhancement feature.
-
Turn on the projector and display an
image.
Note: You can display a pattern to aid in adjusting the projected image using the Settings menu.Note: You can also display a pattern to aid in adjusting the projected image using the Test Pattern button on the remote control.
- Press the Menu button.
- Select the Settings menu and press Enter.
- Select the Geometry Correction setting and press Enter.
-
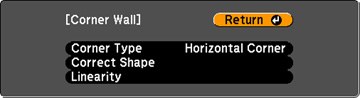
Select the Corner
Wall setting and press Enter.
Note: If you see a confirmation message, press Enter.You see this screen:
- Select the Corner Type setting and press Enter.
- Select one of the following:
- Press the Esc button to return to the Corner Wall menu screen.
- Select the Correct Shape setting and press Enter.
-
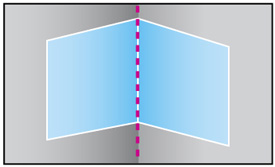
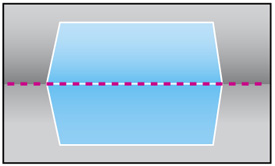
Adjust the projector's position and use lens
shift to center the image over the point where the two surfaces
meet. (The rest of these steps show Horizontal Corner as the
selected Corner Type but the steps are the same for Vertical
Corner.)
Note: You can press Enter to show or hide the image and grid to check the results.
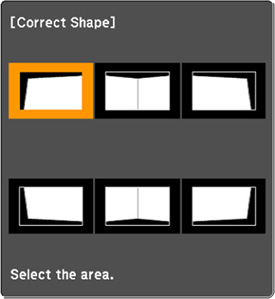
-
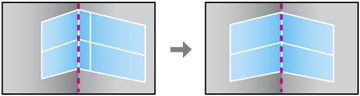
Press the arrow buttons on the projector or
the remote control to select the area you want to adjust. Then
press Enter.
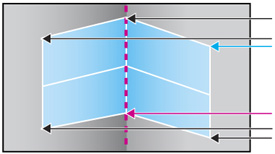
- For horizontal corners, adjust the top area using the lowest point (indicated by the blue arrow) as your reference. Adjust the lower area using the highest point (indicated by the pink arrow) as your reference.
- For vertical corners, adjust the left and right areas using the points nearest the center of the image as your reference points.
Note: To reset your adjustments, press and hold the Esc button for at least 2 seconds to display a reset screen. Then select Yes. - Press and hold the arrow buttons on the projector or remote control to adjust the image shape.
- Repeat the previous two steps as necessary to adjust other image areas. If the image expands or contracts, continue with the next step to adjust the linearity.
- Press the Esc button to return to the Corner Wall screen.
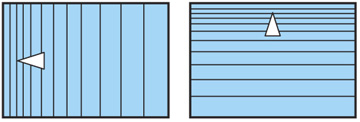
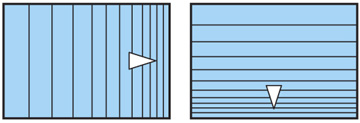
- Select the Linearity setting and press Enter.
- Adjust the linearity by doing the following as necessary:
- When you are finished, press the Menu button.