You can
print one or more photos from a memory card in special layouts on
various sizes of photo paper.
Note: Photos
are placed automatically in the layout. If you want to manually
select where they appear in the layout, select the link at the end
of this topic.
- Load photo paper in your product.
- Insert a memory card into your product's memory card slot.
- Press the
 home button, if
necessary.
home button, if
necessary. - Select Print Photos.
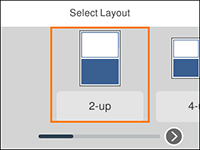
- Select Layout Print.
- Select one of the displayed layout options. You see a screen like this:
- Select your paper and print settings as necessary.
- Press the right arrow button.
- Do one of the following to
select your photos:
- Select the thumbnail images of the photos you want to print by pressing the + or – button. Each photo you select has a number on it to indicate the number of prints you selected.
- Press the OK button to enlarge a thumbnail image. To select an image for print, press the + or – button. Press the left or right arrow button to scroll through and select additional photos.
- To select all photos or a group of photos,
select the
 menu icon. Use the menu options
to browse, select, and change the display order of the photos.
menu icon. Use the menu options
to browse, select, and change the display order of the photos.
- Select Preview and Print.
- Press the right or left arrow button to scroll through the photos you selected, if necessary.
- If you need to edit a
photo, press the
 reset button. You see
an image like this:
Note: Press the reset button again to switch
between the Correction Off and
Correction On settings. With
Correction On selected, any
corrections you make to a photo are displayed on the screen. With
Correction Off selected, any
corrections you make will only be applied to your printouts.
reset button. You see
an image like this:
Note: Press the reset button again to switch
between the Correction Off and
Correction On settings. With
Correction On selected, any
corrections you make to a photo are displayed on the screen. With
Correction Off selected, any
corrections you make will only be applied to your printouts. - For each image, press the + or – button to change the number of copies as necessary.
- When you are ready to
print, press the
 start button.