When you
scan photos with the Epson FastFoto software, the program
automatically saves your scanned images in JPEG format on your
computer in the folder you specify. You can select settings and
enhancements before you scan, if necessary.
Note: This guide
contains instructions for the 2.0 version of the FastFoto software.
If you have an earlier version, you can download and install the
latest software from the Epson support site or using the Epson
Software Updater utility.
Caution:
Because of the speed at which photos are
scanned, dust particles on your photos can cause white lines to
appear in scanned images, and in extreme cases can lightly scratch
the protective finish on your photos. For best results, wipe off
the front and back of your photos before scanning and use the
included microfiber cloth to clean the scanner rollers after every
300 scans, or even before each scanning session. See the link below
for instructions on cleaning the rollers.
Note: If you are
scanning a Polaroid or other instant photo, or a panoramic photo
longer than 15.5 inches (393.8 mm), make sure you select the
correct photo type under Scan
Settings in the Settings
menu.
- Do one of the following to start Epson
FastFoto:
- Windows 10: Click
 and select EPSON Software > Epson FastFoto.
 - Windows 8.x: Navigate to the Apps screen and select Epson FastFoto.
- Windows (other versions): Click
 or Start, and select All
Programs or Programs. Select
EPSON Software > Epson FastFoto.
or Start, and select All
Programs or Programs. Select
EPSON Software > Epson FastFoto. - Mac: Open the Applications folder and select Epson FastFoto.
- Windows 10: Click
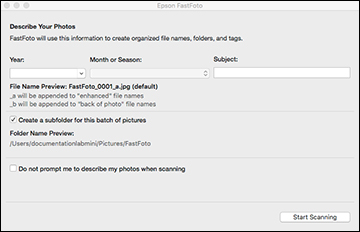
- Click
Start Scanning. You may see a
screen like this:
Windows
Mac