You
can quickly optimize your projected image by selecting image
adjustment settings and saving them as a preset you can reuse
later.
- Press the Menu button. You see a screen like this:
- Select the Image menu and press Enter.
- Select the Image Enhancement setting and press Enter.
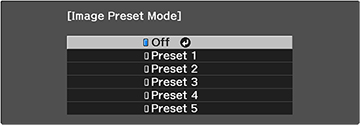
- Select the Image Preset Mode setting and press Enter.
-
Select one of the presets and press
Enter.
Note: If you select a previously used preset, your new adjustments overwrite the old ones.
- Press Esc to return to the Image Enhancement menu.
- Fine-tune the following
settings:
- Frame Interpolation
- Deinterlacing (depends on the signal)
- Noise Reduction
- MPEG Noise Reduction
- Super-resolution
- Detail Enhancement
Note: You can select Image Preset Mode and toggle between Off and the preset you were adjusting to quickly check the effects of the settings. The effect of a preset can vary depending on the input signal type. - Press Menu or Esc to exit the menus. The currently selected Image Preset Mode will be updated with the current settings.