Replace the
scanner rollers when the number of scans exceeds the life cycle of
the rollers. Check the scanner roller counter to see when you need
to replace the rollers.
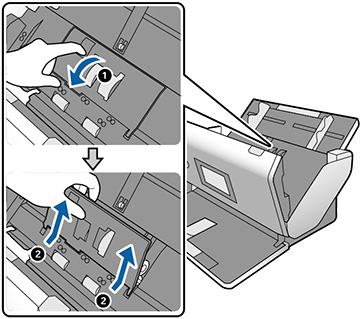
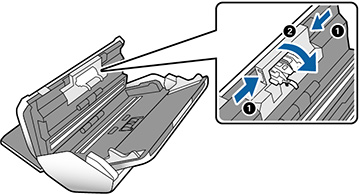
- Pull down on the cover open lever and open the scanner cover.
- Press down on the pickup roller cover latch and pull up the cover to remove it.
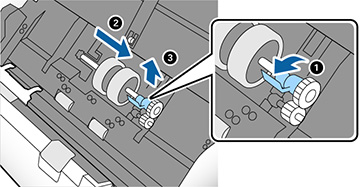
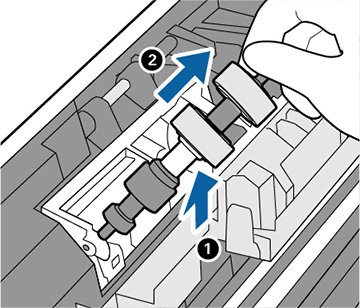
- Pull
down the tab on the pickup roller and slide the roller to the right
to remove it.
Caution:Do not use excessive force when removing the pickup roller or you could damage the scanner.
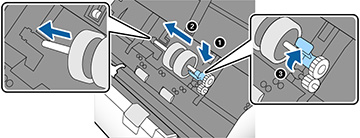
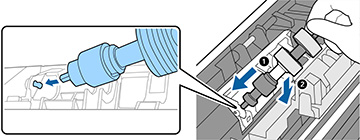
- To install the new pickup roller, align the notches on the roller unit and slide it to the left. Press up on the tab to secure the roller.
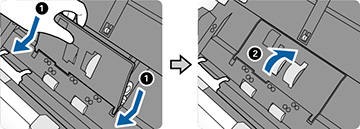
- Align
the bottom edge of the pickup roller cover into the notches as
shown and press it down until it clicks into place.
Note: If you are not able to close the cover, the pickup roller is not installed correctly. Remove the pickup roller and reinstall it, then try to close the cover again.
- Squeeze
the tabs on the sides of the separation roller cover and open the
cover.
Caution:Be careful not to apply too much force when opening the cover.
- Lift the left side of the separation roller and remove it.
- To install a new separation roller, insert the end of the roller into the hole on the right side and lower the other end of the roller into place.