After you
move your product short distances (such as between floors in the
same building), unpack it as described here. If you are
transporting your printer long distances, contact Epson for
support.
Note: After moving
the printer, make sure you return the transportation cap to the
printing position as described here. You cannot print when the cap
is in the transportation position.
Note: Before
storing your product for a long period, replace low, expended, or
expired ink to help prevent the print head from drying out. Store
your product in a cool, dry place.
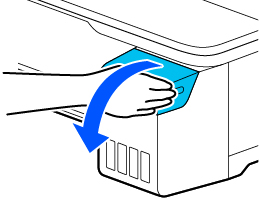
- Open the ink tank cover.
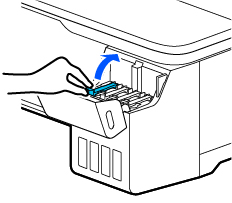
- Open all of the ink tank caps.
- Remove the transportation cap.
- Flip the transportation cap so the square ends face down.
- Insert the square ends of the transportation cap as shown.
- Securely close the ink tank caps so they all lay flat.
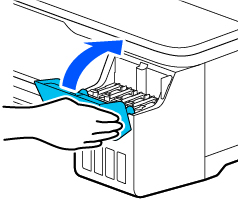
- Close the ink tank cover.