If you need
to move or transport your product, prepare it as described here.
Moving the printer assumes that you are moving it to another
location on the same floor, without using elevators, ramps, or
stairs. If you are moving the printer between floors or to another
building, follow the instructions for transporting your product.
Warning: Use only
the indicated locations to lift the printer. Otherwise, the printer
may be damaged or you may be injured.
Caution:
During transportation and storage, follow
these guidelines:
- If you need to move or transport your product when the temperature is 14°F (–10°C) or lower, you must first discharge the ink to keep the print head in optimum condition.
- Use the casters to move the printer indoors a short distance over a level floor. Do not use the casters for transport.
- Avoid tilting the product more than 10° forward or backward while moving it.
- Leave the ink cartridges installed. Removing the cartridges can dry out the print head and may prevent the product from printing, or ink may leak.
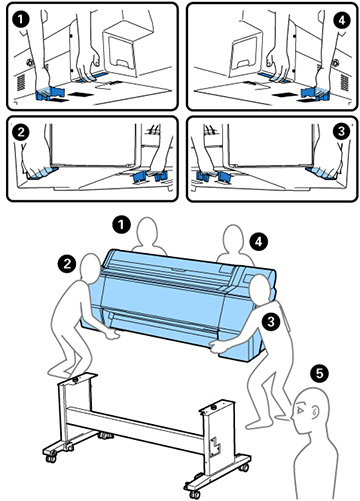
- If you are repackaging the printer for transport, use four or more people to lift it.
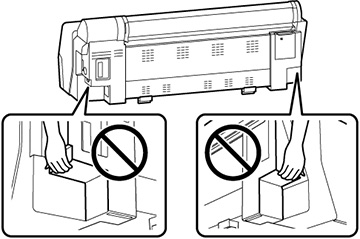
- When lifting the printer, do not place your hands in the following locations:
Note: Before
storing your product for a long period, replace low, expended, or
expired ink to help prevent the print head from drying out. Store
your product in a cool, dry place.

