You can load roll paper with a 2- or 3-inch
core and a width of up to 24 inches (61 cm) [SureColor P7500
Series] or 44 inches (112 cm) [SureColor P9500 Series].
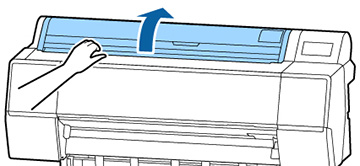
- Open the roll paper cover.
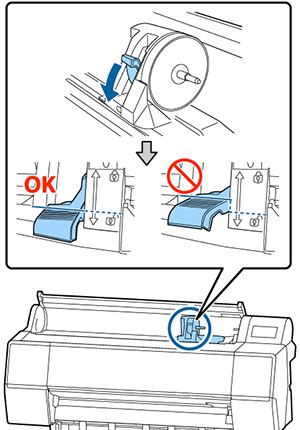
- Firmly
push down the lock lever on the roll paper holder.
Note: Make sure you push the lock lever all the way down to unlock it completely.
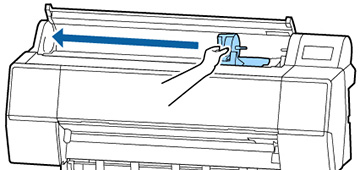
- Slide the roll paper holder to the
left using the handle on the holder.
Note: Always use the handle when sliding the roll paper holder.
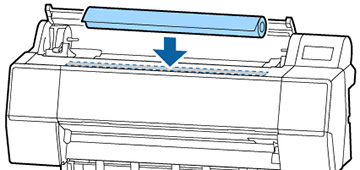
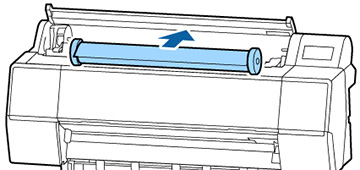
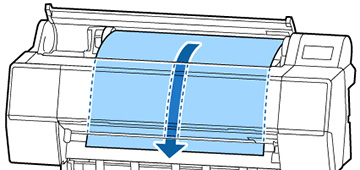
- Place the roll paper on top of the printer with the leading edge of the paper on top of the roll, as shown.
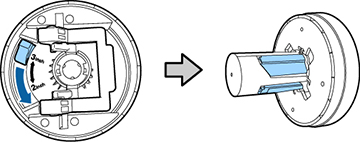
- Slide the tabs on the roll media
adapters to the position that matches the core size of the roll
paper, if necessary.
2-inch core
3-inch core
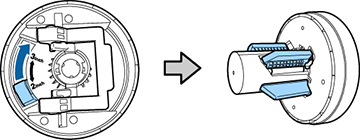
- Release the tension levers on both roll media adapters as shown.
- Push the adapters into the paper core at both ends of the roll. Then push down the tension levers.
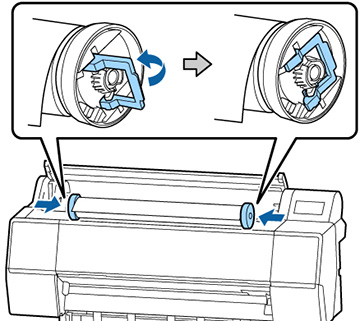
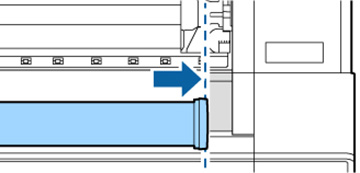
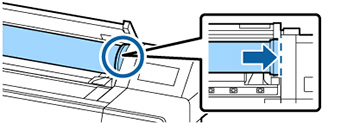
- Move the roll paper to the right side of the printer until it touches the roll paper guide.
- Slide the roll paper holder until the left roll paper adapter aligns with the arrow on the holder.
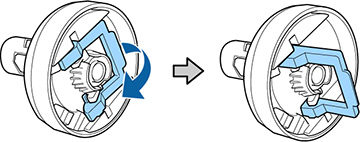
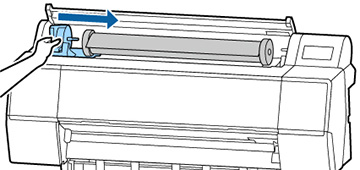
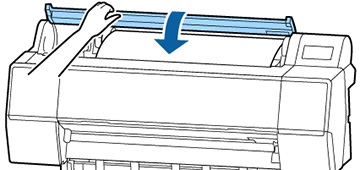
- Roll the paper slowly into position
between the roll paper holders.
Caution:Rolling the roll paper with too much force may damage the printer or the roll paper adapters.
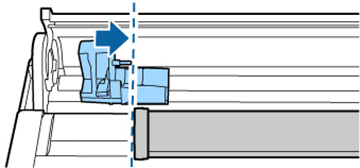
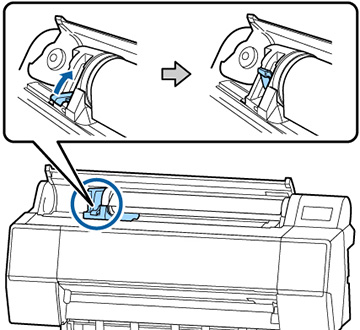
- Slide the roll paper holder to the
right to secure the roll paper in the printer. Make sure both ends
of the roll paper are secured in the adapters.
Note: Always use the handle when sliding the roll paper holder.
- Pull up the lock lever on the roll paper holder to lock it in place.
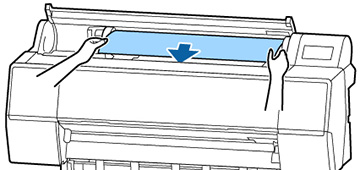
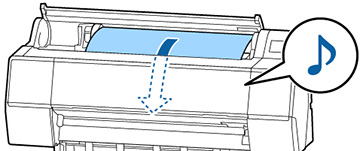
- Insert the leading edge of the paper into the paper feed slot until you hear a sound.
- Make sure the roll paper is taut and the leading edge is not folded.
- Close the roll paper cover.
Note: To prevent dust from accumulating inside the printer, always keep the roll paper cover closed unless you are loading or unloading media.