You can copy
documents or photos onto various sizes and types of paper,
including Epson special papers.
- Load the paper you want to print on.
- Place your original document or photo on the scanner glass, or place multi-page documents in the ADF.
- Press the
 home button, if
necessary.
home button, if
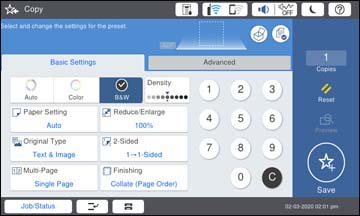
necessary. - Select Copy. You see a screen like this:
- To print more than one copy, press a number key on the
product's control panel, or select Copies and use the on-screen keyboard to
enter the number of copies.
Note: If you want to print copies using a saved group, select Advanced and then select Print Sets. Select the group you want to use and select OK.
- Change any of the displayed settings as necessary.
- Select Advanced to view
and change additional copy settings, if necessary.
Note: To save the copied image to the product's internal storage, select File Storing and enable the File Storing setting. Change any of the displayed settings as needed.Note: If there is an image at the hole punch position, select Binding Margin and set a binding margin of 0.71 inch (18 mm) before copying. If you set a binding margin, you can select Binding Width, Reduce to Fit Paper, or Erase Image Over Margin to adjust your image accordingly.
- Select Preview to
preview your copy on the LCD screen.
Note: If you are printing multiple copies, you can enable the Proof Copy setting from the Advanced tab to print one copy for confirmation before printing the rest.
- Select Presets to save
your copy settings.
Note: Presets can be locked by an administrator. If you can't access or change this setting, contact your administrator for assistance.
- When you are ready to copy, select the Copy icon.
Note: To cancel printing, select Cancel on the LCD screen, then select Cancel Copy to confirm.