You can scan
and review documents in Epson ScanSmart.
Note: The images
show Windows screens; Mac screens may be slightly
different.
- Start
the scan by doing one of the following:
- Press the
 start button on the scanner. Epson
ScanSmart automatically opens on your computer and the scan job
begins.
start button on the scanner. Epson
ScanSmart automatically opens on your computer and the scan job
begins.
- Open Epson ScanSmart on your computer. Do one of the
following:
- Windows 11: Click
 , then search for Epson ScanSmart and select it.
 - Windows 10: Click
 > Epson Software > Epson ScanSmart.
 - Windows 8.x: Navigate to the Apps screen and select Epson ScanSmart.
- Windows (other versions): Click
 or Start, and select All
Programs or Programs. Select
Epson Software > Epson ScanSmart.
or Start, and select All
Programs or Programs. Select
Epson Software > Epson ScanSmart. - Mac: Open the Applications folder, open the Epson Software folder, and select Epson ScanSmart.
You see a screen like this:
- Windows 11: Click
- Press the
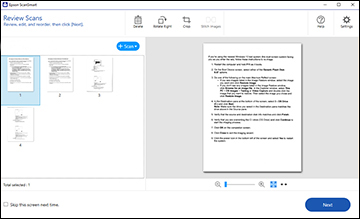
- Select the scan option. The scan job begins and your original feeds through the scanner. When scanning is complete, you see a screen like this:
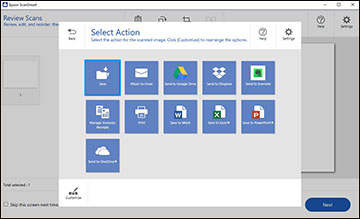
- When you are finished reviewing the scanned images, click Next. You see a screen like this: