You can scan
an image to your computer using your product's control panel
buttons.
Your product automatically selects default scan settings, but you can view or change them as necessary. You can change the default scan settings using the Event Manager utility on the computer.
- Make sure you installed the product software and connected
the product to your computer or network.
Note: Restart your computer after installing the product software to enable scanning from the control panel.
- Place your original on the product for scanning.
- Press the
 home button, if
necessary.
home button, if
necessary.
- Press the left or right arrow button to select Scan and press the OK button.
- Press the left or right arrow button to select a scan
option and press the OK button.
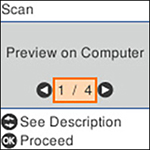
- Preview on Computer previews the scanned image on a computer before saving (Windows 7 or later or OS X 10.11.x or later).
- To Computer (JPEG) saves your scan as a JPEG file on your computer or as an image capture on a Mac.
- To Computer (PDF) saves your scan as a PDF file on your computer or as an image capture on a Mac.
- To WSD lets you manage network scanning in Windows 11, Windows 10, Windows 8.x, Windows 7, or Windows Vista (English only). To use this feature, you must first set up a WSD (Web Services for Devices) port on your Windows 7 or Windows Vista computer (the port is set up automatically on Windows 11, Windows 10, and Windows 8.x).
- Do one of the
following:
- If you are scanning to a network computer, select the target computer from the list.
- If your product is connected directly to your computer with a USB cable, select USB Connection.
- Press the
 start button to start
scanning.
start button to start
scanning.