You can load roll paper with a 2-
or 3-inch core and a compatible width (see the link below). Load
roll paper onto the spindle before loading the roll paper in the
printer.
Note: Roll 2 is
not available on SureColor P6570E/T3770E.
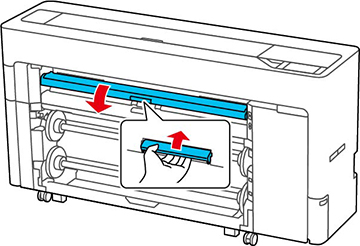
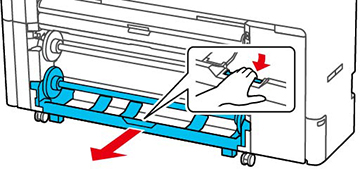
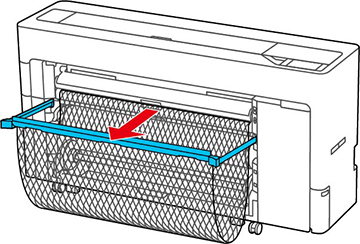
- Lift up to release the paper output tray, then gently pull the tray open and place it into position A (the lowest position) as shown.
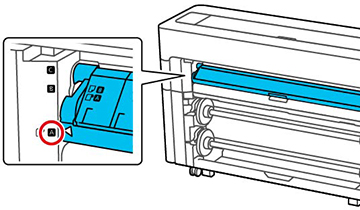
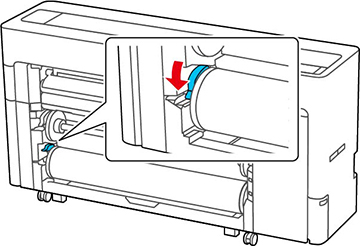
- Pull up the lock lever on the roll
paper holder.
Note: Make sure you pull the lock lever all the way up to unlock it completely.
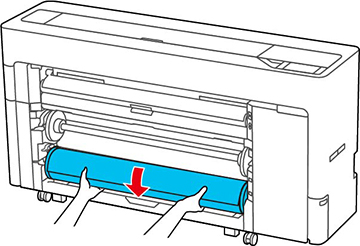
- Pull out the Roll 2 unit.
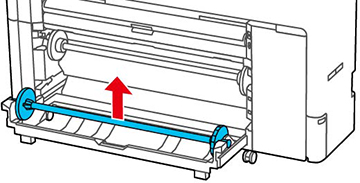
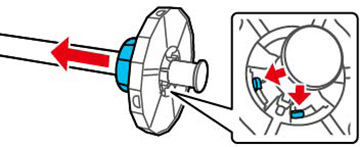
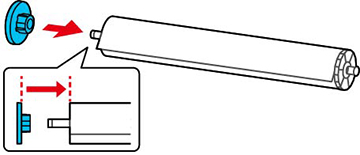
- Remove the spindle.
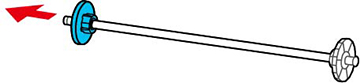
- Remove the transparent paper stop from the spindle.
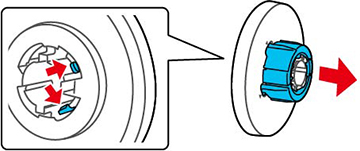
- Do one of the following:
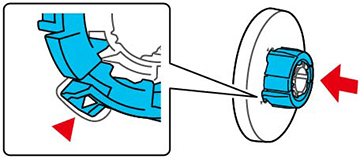
- 2-inch roll core: If installed, remove the core adapters from both paper stops. Push the two tabs on each paper stop to remove the adapter.
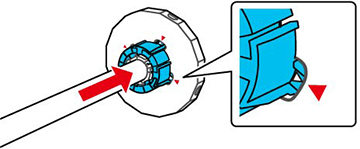
- 3-inch core: Install the core adapters on both paper stops. Align the triangle marks on the paper stop with the triangle marks on the adapter and push the adapter in until the tabs are secured.
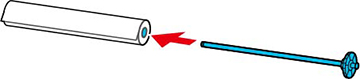
- Insert the spindle into the roll paper core as shown, with the leading edge of the roll paper facing towards you. Push the fixed paper stop against the roll paper until there is no gap between the paper stop and the roll paper.
- Attach the transparent paper stop to the spindle and press it in until there is no gap between the paper stop and the roll paper.
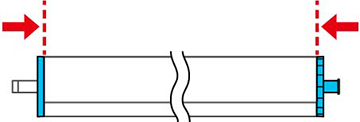
- Make sure both paper stops are flush against the roll paper.
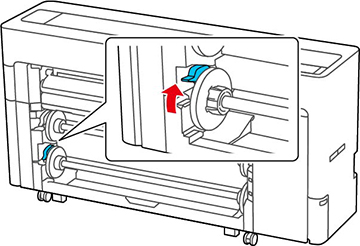
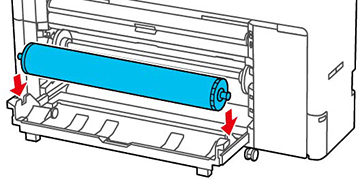
- Place the spindle into the grooves on the Roll 2 unit with the black end of the spindle on the right, then push the Roll 2 unit in.
- Push down the lock lever on the roll paper holder to lock it in place.
- On the LCD screen, select
 > Paper
Setting > Roll 2 >
Paper Type and select the paper type
that matches the loaded paper.
Note: It is important to select the correct media type for each loaded media. Most Epson media will be loaded with the driver installation. If the paper type is not displayed on the control panel or in the printer driver, you can create a custom paper setting using the control panel, Epson Media Installer, or Epson Edge Print. (For details on how to use Epson Edge Print, see the Epson Edge Print manual.)
> Paper
Setting > Roll 2 >
Paper Type and select the paper type
that matches the loaded paper.
Note: It is important to select the correct media type for each loaded media. Most Epson media will be loaded with the driver installation. If the paper type is not displayed on the control panel or in the printer driver, you can create a custom paper setting using the control panel, Epson Media Installer, or Epson Edge Print. (For details on how to use Epson Edge Print, see the Epson Edge Print manual.)For non-Epson media, consult the manufacturer's website for appropriate media types. If the roll paper has a barcode printed on it, the printer reads it and automatically loads the correct settings. If you do not select settings within 90 seconds, the printer uses the displayed settings automatically.
- If Roll Paper
Setup > Auto Loading >
Off is selected in the Printer
Settings menu, or if the roll paper doesn't feed automatically, do
the following to manually feed the paper:
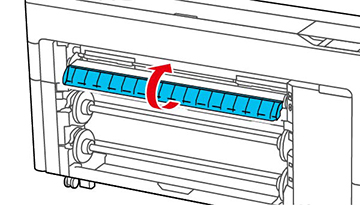
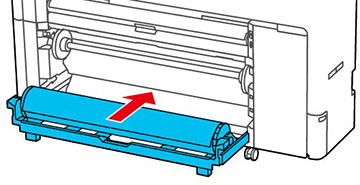
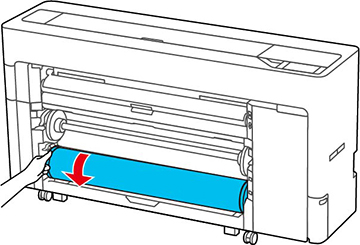
- Gently turn the paper roll and guide the leading edge of the paper into the paper feed slot. Make sure the roll paper is taut and the leading edge is not folded.
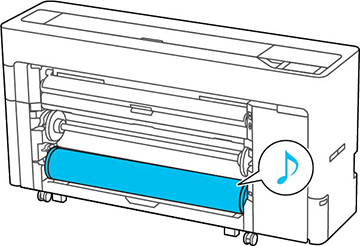
- Insert the leading edge of the paper into the paper feed slot until you hear a sound.
- Pull out the paper basket, if
necessary.
You can stack one sheet at a time in the paper basket. When printing multiple sheets, remove the ejected paper so that printouts do not accumulate in the basket.Note: If you are printing banners or other media larger than can fit in the paper basket, do not pull out the paper basket. Hold the ejected paper in both hands and support it so that the paper does not touch the floor.