Select the
basic settings for the document or photo you want to print.
- Open a
photo or document for printing.
- Select
the print command in your application.
Note: You may need
to select a print icon on your screen, the Print option in the File menu, or another
command. See your application's help utility for
details.
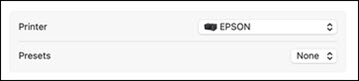
- Select
your product as the Printer
setting.
You see the expanded printer settings window for your product:
Note: The print
window may look different, depending on the Mac OS version and the
application you are using.
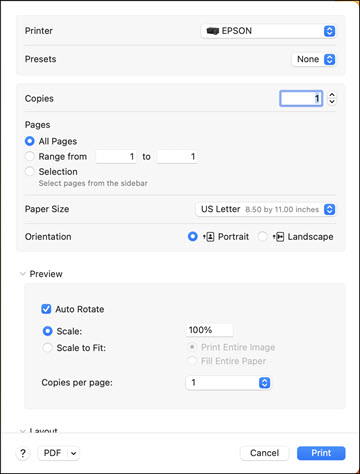
- Select
the Copies and Pages settings as necessary.
Note: If you do
not see these settings in the print window, check for them in your
application before printing.
- Select
the page setup options: Paper Size
and Orientation.
Note: If you do
not see these settings in the print window, check for them in your
application before printing. They may be accessible by selecting
Page Setup from the File menu.
Note: Paper sizes
may include additional options such as Borderless.
- Select
any application-specific settings that appear on the screen, such
as those shown in the image above for the Preview
application.
- Do one
of the following:
- macOS 13: Select the
Printer Options menu and then select
Print Settings.
- macOS 12 and earlier: Select
Print Settings or Printer Features from the pop-up menu.
You see a menu like this:
Note: The
available print settings and appearance of the print window may be
different than those covered here, depending on the Mac OS version
and the application you are using.
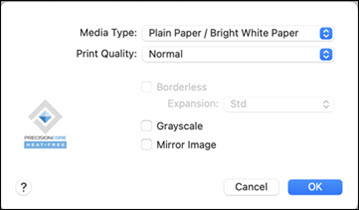
- Select
the type of paper you loaded as the Media
Type setting.
Note: The setting
may not exactly match the name of your paper. Check the paper type
settings list for details.
- Select
the Print Quality setting you want
to use.
- Select the Borderless checkbox if you want to print a
borderless photo. If the option is grayed out, change the
Media Type setting to a paper type
that supports borderless printing.
- Select
any of the available print options.