Scanning in Epson Scan 2

Epson Scan 2 gives you access to basic and advanced scanning features. You can scan your document and save the scanned image in various file formats in your operating system's Documents or My Documents folder, or open it in your scanning program. You can preview the scanned image and select or change settings as necessary.

  1. Load your original in the product.
  2. Start Epson Scan 2. You see this window:


    Note: The Document Source setting is automatically set to ADF for your product.
  3. If you want to scan different size originals by loading them into the input slot one by one, check the Automatic Feeding Mode checkbox and click Scan. Scanning begins as soon as you load each original.
    Note: Select Settings > Document Source Settings > Automatic Feeding Mode Timeout (minutes) and enter a value to set the number of minutes before the scanner exits Automatic Feeding Mode.
    Note: When scanning thin paper and other originals that are likely to jam, press the  slow mode button before placing the original to slow down the scanning speed (DS-C490).
  4. Select the Scanning Side setting that matches the sides of the original that you want to scan.
  5. Select the Document Size setting that matches the size of your original, or select Auto Detect to have Epson Scan 2 automatically detect the size. You can select Customize to enter a custom size, if necessary.
  6. Click on one of the orientation icons, if applicable.
  7. Select your original image type and how you want it scanned as the Image Type setting.
  8. Select the Resolution setting you want to use for your scan.
  9. Select any of the additional settings that you want to use on the Main Settings tab.
  10. Click the Advanced Settings tab and select any settings that you want to use.
  11. To see a preview of your scan with the settings you selected, click the Preview button. Epson Scan 2 previews your original and displays the results in the Epson Scan 2 window.
  12. Reinsert your original into the ADF.
  13. If scanning an original in a carrier sheet or other special original, see the link at the end of this section for other setting requirements for special documents.
  14. Select the format in which you want to save your scanned file as the Image Format setting. If necessary, select Options and select any desired format options.
  15. Select Settings to modify the file name settings. Enter the file name for your scanned file in the File Name field.
  16. Select the location in which you want to save your scanned file as the Folder setting. If necessary, select Select to choose an alternate folder or create a new folder.
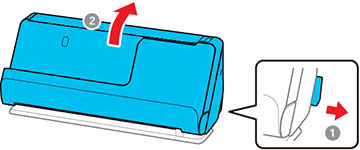
  17. Make sure the product is in the correct scanning position for the type of original.
    • For multiple sheets of standard-size originals, thin paper, or receipts, place the scanner in the vertical path position.


    • For special originals such as thick or long documents, passports, or plastic cards, place the scanner in the straight path position.


  18. Click Scan. The product scans your original and saves the scanned file in the location you specified.
  19. If you selected the Automatic Feeding Mode setting, place your next original in the ADF for scanning. When you finish scanning originals, click Finish.
Related tasks
Loading Originals in the Input Tray
Related references
Scanner Positions