Turn
on the projector before you turn on the computer or video equipment
you want to use.
Note: If you
will use the projector at altitudes above 4921 feet (1500 m), turn
on High Altitude Mode in the
projector's Settings menu to ensure the projector's internal
temperature is regulated properly.
- Remove the projector's side cover, if necessary.
- Connect the computer or video equipment you want to use to one of the projector's HDMI ports, if necessary.
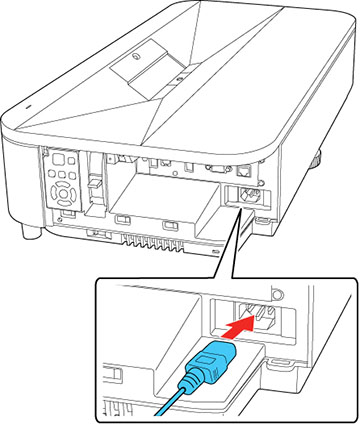
- Connect the power cord to the projector's power inlet.
- Plug the power cord into an electrical outlet. The projector enters standby mode. This means the projector is receiving power, but has not yet been turned on.
-
Press the power button on the projector or
remote control to turn on the projector. The status light
flashes blue as the projector warms up. When the projector is
warmed up, the status light stops flashing and turns blue.
Warning: Never look into the projector lens when the laser is on. This can damage your eyes and is especially dangerous for children and pets. If you are using the remote control to turn the projector on, make sure no one is looking into the lens or in front of the projector before turning it on.Caution:Make sure no objects are blocking the light from the projector lens. Objects blocking the lens for an extended time can melt, burn, or start a fire, and light that is reflected back into the lens can cause the projector to malfunction. To stop projection, use the A/V Mute function, or turn off the projector (blanking the screen will not pause video content).Note: When you turn on the projector for the first time, the initial setup wizard is displayed. Make the necessary Projection, Language, and Date & Time changes using the control panel or remote control. Adjust the shape and position settings for the projected image as necessary. Turn on the Quick Startup setting to start the projector faster if necessary. When Quick Startup is enabled in the projector's Operation menu, the projector becomes ready for use in several seconds the next time you turn the projector on.
- Turn on the connected video source.
- Carefully replace the
projector's side cover.
Note: When the Direct Power On setting is set to On in the projector's Operation menu, the projector turns on as soon as you plug it in. Note that the projector also turns on automatically in cases such as recovery from a power outage. If you select a specific port as the Auto Power On setting in the projector's Operation menu, the projector turns on as soon as it detects a signal or cable connection from that port.