When you
disable the
Auto Cut setting, you
can print a cutting guideline between print jobs as a guide for
manual cutting.
- Do one of the following to disable the
Auto Cut setting:
- Select the
 icon > Cut
Settings > Auto Cut >
Off.
icon > Cut
Settings > Auto Cut >
Off.
- Select Off from the printer
driver's Roll Paper Option >
Auto Cut setting.
- Print your file.
- Select the icon and do one of the
following:
- Select Print
Cutting Guideline.
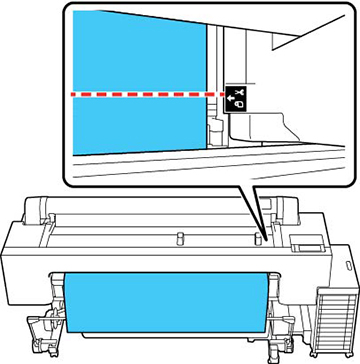
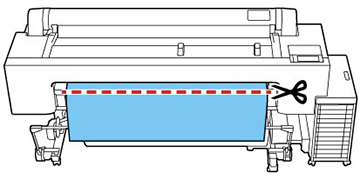
The cutting guideline is printed and the paper is
automatically ejected.
- Use scissors to cut along the cutting
guideline and then select Done.
The roll rewinds and the paper's leading edge returns to the
print wait position.