![]()
User's Guide
|
|
Index |
|
Help |
|
Safety | |||||
|
|
Contents |
|
||||||||
|
|
|
|||||||||||||||||||||||||||||||||
Network Software / EpsonNet Print
Adding a port for a device assigned with a dynamic IP address
Follow the steps below to add a port using the Add Printer Wizard.
| Note: |
|
|
|
Install the printer driver before adding a port for the device. See the manual shipped with your device for instructions on how to install the printer driver.
 | Click Start, point to Settings, and then select Printers. |
 | Right-click the target device icon, and then select Properties. |
 | Click the Details tab, and then click the Add Port button. Select the Other radio button, and then select EpsonNet Print Port. Click OK. |
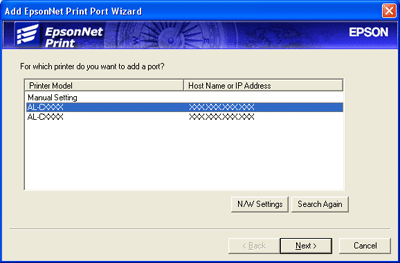
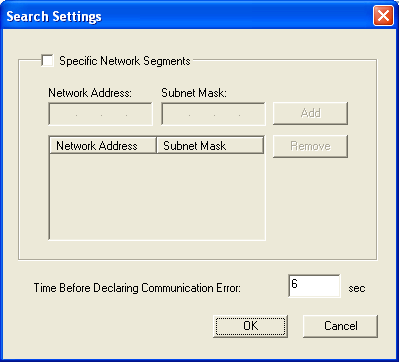
 | Select the target device, and then click Next. |
| Note: |
|
|
|
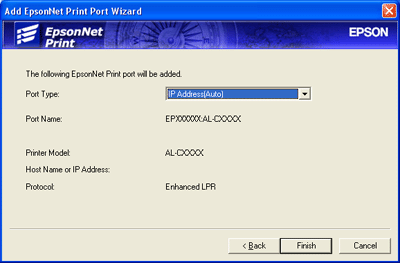
 | Confirm the information about the device's port you want to configure, and then click Finish. |
|
Items |
Explanations |
|
Port Type |
The following items are listed in the pull-down menu, and you can select the port type you need. IP Address(Auto): Configure the port automatically. If the IP address of the device is acquired automatically and the computer and the device are in the same segment, you can select this port type. IP Address(Manual): Use the device's IP Address for the port name. HostName (DNS): Use the device's host name registered in the DNS server for the port name. MS Network: Use the NetBIOS name registered in the device for the port name. |
|
The port Information |
The following items are displayed:
- Port Name (automatically assigned according to the selected port type) |
|
Finish button |
Register the port information to the system and close the Add EpsonNet Print Port Wizard. |
|
Back button |
Go back to the device list window. |
|
Cancel button |
Close the Add EpsonNet Print Port Wizard. |
The printer is now ready for peer-to-peer printing. To configure the printer port, see Configuring the Printer Port.
Install the printer driver before adding a port for the device. See the manual shipped with your device for instructions on how to install the printer driver.
|
| Click Start, point to Settings, and then select Printers. |
|
| Right-click the target device icon, and then select Properties. |
|
| Click the Details tab, and then click the Add Port button. Select the Other radio button, and then select EpsonNet Print Port. Click OK. |
|
| Select Manual Setting from the list, and then click Next. |

|
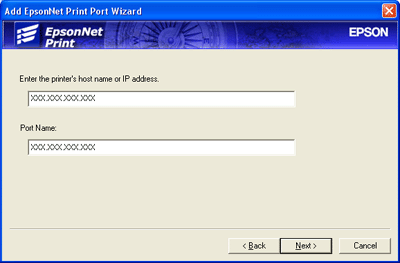
| Enter the device's name and the port name is automatically entered to the Port Name edit box. Then click Next. |
 | Confirm the information about the device's port you want to configure, and then click Finish. |

|
Items |
Explanations |
|
The port Information |
The following items are displayed:
- Port Name |
|
Finish button |
Register the port information to the system and close the Add EpsonNet Print Port Wizard. |
|
Back button |
Go back to the device list window. |
|
Cancel button |
Close the Add EpsonNet Print Port Wizard. |
The printer is now ready for peer-to-peer printing. To configure the printer port, see Configuring the Printer Port.
 Previous |
 Next |
| Version 1.00E, Copyright © 2003, SEIKO EPSON CORPORATION |