 |
 | How to Set Up the Network Interface |
 |
 Connecting the Network Interface to the Network Connecting the Network Interface to the Network
 Configuring the Network Interface (For Windows Users) Configuring the Network Interface (For Windows Users)
 Configuring the Network Interface (For Macintosh Users) Configuring the Network Interface (For Macintosh Users)
| Connecting the Network Interface to the Network |
Follow the instructions below to connect the network interface to the network.
 |
Make sure that your printer is turned off.
|
 |
Connect one end of the network cable to the RJ-45 connector on the network interface, and the other end to the network.
|
 |  |
Caution: |
 |  |
Note: |
 |  |
|
You can use both 10Base-T and 100Base-TX. When you print a lot of data, we recommend you use a high-speed network of 100Base-TX with light traffic.
|
|
 |
Turn on your printer. After the status lights go off, print a network status sheet.
|
 |  |
Caution: |
 |  |
|
After turning off the printer, wait until the status lights go off before turning it back on; otherwise the network interface may not work correctly.
|
|
 |  |
Note for Mac OS X 10.2.4 or later: |
 |  |
|
Since the printer supports Rendezvous and is on by default, you can use the printer on a network just by connecting it to the network. If you want to disable the Rendezvous setting, use the printer’s control panel. See Setting an IP Address on the Printer’s Control Panel for details.
|
|
Now, you can configure the network interface to use on the TCP/IP network and also install the printer driver.
If you are using Windows, see Configuring the Network Interface (For Windows Users).
If you are using Macintosh, see Configuring the Network Interface (For Macintosh Users).
 Top Top
| Configuring the Network Interface (For Windows Users) |
Configure the network interface for use on the TCP/IP network and install the printer driver on your computer.
 |
Insert the Software CD-ROM in the CD-ROM drive.
|
 |
The Software Installation screen opens automatically.
|
If the Software Installation screen does not appear, double-click EPSETUP.EXE on the CD-ROM.
 |
Make sure that all applications are closed, and then click the Continue button.
|

 |
Read the license agreement, and then click the Agree button. If necessary, select the model of your printer.
|
 |
Select Network.
|
 |  |
Note: |
 |  |
|
If your printer is connected to your computer with a USB cable, select Local. Then follow the on-screen instructions.
|
|

 |
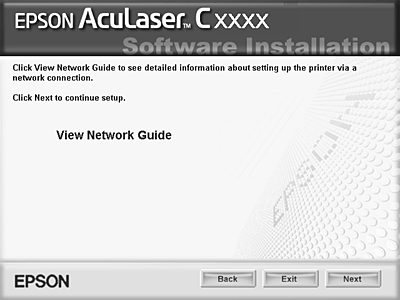
Click View Network Guide to see detailed information. Click the Next button to continue setup.
|
 |
Click the Install button. Follow the on-screen instructions.
|

 |  |
Note: |
 |  |
|
This screen may vary depending on the printer.
|
|
 |  |
Note for Windows XP Service Pack 2 Users: |
 |  |
|
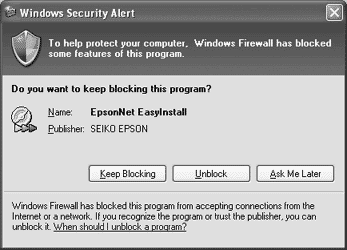
If the following screen appears, click the Unblock button; otherwise the printer is not listed on the screen of EpsonNet EasyInstall.
|
|
 |
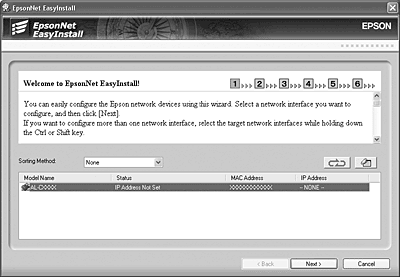
EpsonNet EasyInstall starts. Select the printer and then click the Next button.
|
 |
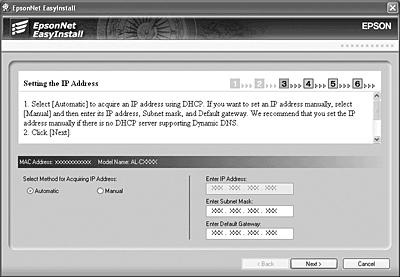
Select a method for specifying the IP address. If you select Automatic, DHCP becomes available and assigns an IP address automatically. If you want to set the IP address manually, select Manual and then enter the IP address, subnet mask, and default gateway. Click the Next button.
|
 |
Confirm the settings you have made, and then click the Next button.
|

 |
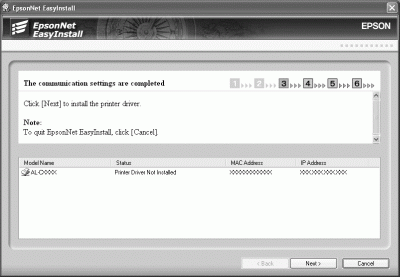
Select the printer with its IP address you have just set, and then click the Next button to install the printer driver.
|
 |
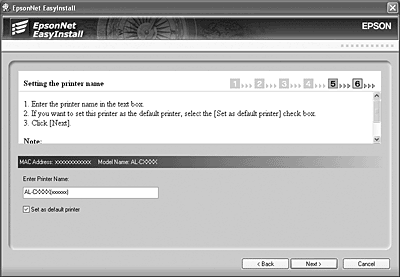
Enter the printer name. If you want to set the printer as the default printer, select the Set as default printer check box. Click the Next button.
|
 |  |
Note for Windows XP Service Pack 2 users: |
 |  |
|
If the following screen appears, click the Unblock button.

|
|
 |
Select Yes to print a test page; otherwise, select No. Click the Next button.
|

 |
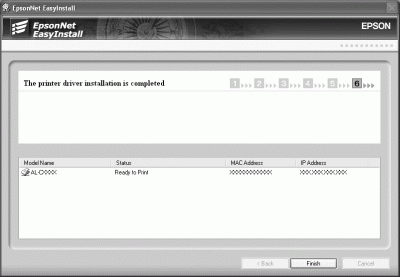
Click the Finish button, and then follow the on-screen instructions to complete the installation.
|
 |
Click the Exit button.
|

Now you can use the printer on the TCP/IP network.
 Top Top
| Configuring the Network Interface (For Macintosh Users) |
Configure the network interface for use on the TCP/IP network and install the printer driver on your computer.
 |
Insert the Software CD-ROM in the CD-ROM drive.
|
 |
Double-click the EPSON CD-ROM icon.
|
 |
Double-click the appropriate OS icon in the EPSON folder.
|
 |
Make sure that all applications are closed, and then click the Continue button.
|

 |
Read the license agreement, and then click the Agree button. If necessary, select the model of your printer.
|
 |
Select Network.
|
 |  |
Note: |
 |  |
|
If your printer is connected to your computer with a USB cable, select Local, and then follow the on-screen instructions.

|
|
 |
Click View Network Guide to see detailed information. Click the Next button to continue setup.
|

 |
Click the Install button, and then follow the on-screen instructions.
|

 |  |
Note: |
 |  |
|
This screen may vary depending on the printer.
|
|
 |
EpsonNet EasyInstall starts. Select the printer and then click the Next button.
|

 |
Select a method for specifying the IP address. If you select Automatic, DHCP becomes available and assigns an IP address automatically. If you want to set the IP address manually, select Manual and then enter the IP address, subnet mask, and default gateway. Click the Next button.
|

 |
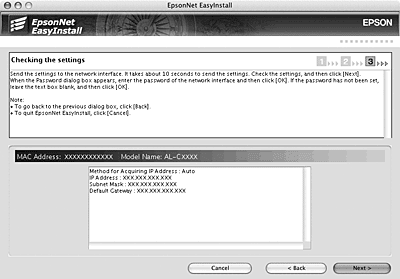
Check the settings you have made, and then click the Next button.
|
 |
Click the Finish button, and then follow the on-screen instructions to complete the installation.
|
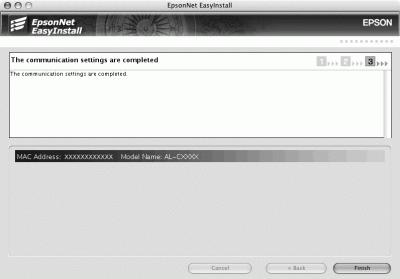
Then you need to set up the printer. Follow the steps below.
Setting Up the Printer
Mac OS X
 |
Open the Applications folder.
|
 |
Open the Utilities folder.
|
 |
Open Print Center (for Mac OS X 10.2 or below) or Printer Setup Utility (for Mac OS X 10.3), and then click Add.
|
 |
Select Rendezvous from the drop down list.
|
 |
Select the printer model from the list.
|
 |
Click Add.
|
Now you can use the printer on the TCP/IP network.
 |
Note: |
 |
|
If your product supports the scanning function, see the product's User's Guide to make the settings.
|
|
 Top Top
|  |


 Connecting the Network Interface to the Network


 Top
Top


