|

User's Guide
|
|
Scanning
Scanning in a Network Environment
 Starting EPSON Scan settings
Scanning an image
Setting up a client computer
Starting EPSON Scan settings
Make sure that the Epson product and Network Image Express Card are turned on and working properly. Then, follow the steps below to start EPSON Scan settings and enable network scanning.
 |
Note:
|
 | -
For Windows 2000 and XP, you need the administrative privileges to install the software.
|
|
| -
For Windows 2000, XP, Mac OS X, you need to use the administrative privileges to log in. Any changes made by the administrator to the settings apply to all users.
|
|
|
Note for Mac OS X 10.3 users:
|
| |
Do not use the Fast User Switching function while using this product.
|
|
 |
Obtain the IP address or host name of the Network Image Express Card from your network administrator.
|
 |
Start EPSON Scan Settings.
|
For Windows users:
Click Start, point to All Programs (for Windows XP users) or Programs (for Windows Me, 98, and 2000 users) and EPSON Scan, and then select EPSON Scan Settings.

For Mac OS X users:
Click the EPSON Scan Settings icon in the Utility folder.

 |
Select your product from the Select Scanner drop-down list.
|
 |
Change the Connection setting to Network. Enter the Network Image Express Card's IP address or host name in the Network Scanner Address field.
|

 |
Click Test to check the connection. If everything works properly, this is indicated by a message appearing under Scanner Status in the dialog box.
|

 |
Click OK to save the settings, and then close the dialog box.
|

[Top]
Scanning an image
Network scanning requires that all of the devices (this product, the optional EPSON Network Image Express Card, and the client computer) are turned on. Also, make sure EPSON Scan is running.
There are several methods you can use to scan a document.
-
Click the Scan button in the EPSON Scan main window on the client computer
Start EPSON Scan on the client computer. Make any desired settings, and then click the Scan button to start scanning.
-
Use the
 B&W Start or Color Start button on the product
Start EPSON Scan on the client computer, and then click the B&W Start or Color Start button on the product.
|
Note:
|
| |
In a network environment, the B&W Start or Color Start button on the product works in the same way as clicking the Scan button in the EPSON Scan main window.
|
|
[Top]
Setting up a client computer
To allow networking, each client computer in the network requires a Network Interface Card and a Network Interface Card (NIC) driver. Install the Network Interface Card and Network Interface Card (NIC) driver on each client computer. For details on the installation procedures, refer to the corresponding manuals included with the card.
Installing the TCP/IP protocol
To install the TCP/IP protocol on a client computer on the network, follow the instructions below.
For Windows XP and 2000 users
|
Note for Windows XP users:
|
| |
Screen shots for Windows 2000 are used in this section, so they may differ in appearance from what actually appears on your screen. The instructions are the same, except as noted.
|
|
|
|
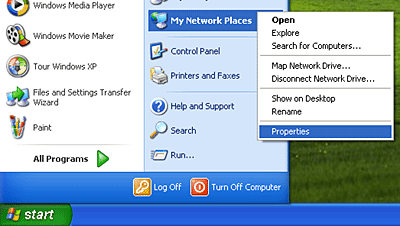
For Windows XP users:
Click Start, right-click My Network Places, and then select Properties.
|
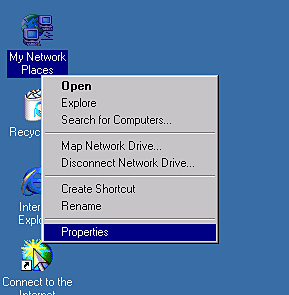
For Windows 2000 users:
Right-click the My Network Places icon, and then select Properties.
|
|
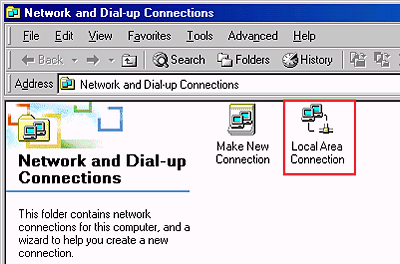
Double-click Local Area Connection.
|
|
|
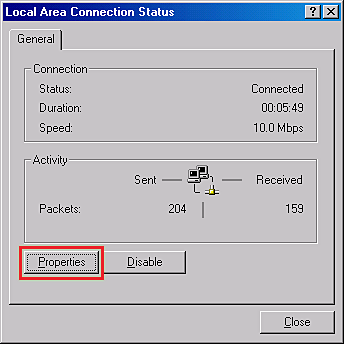
Click Properties.
|
|
|
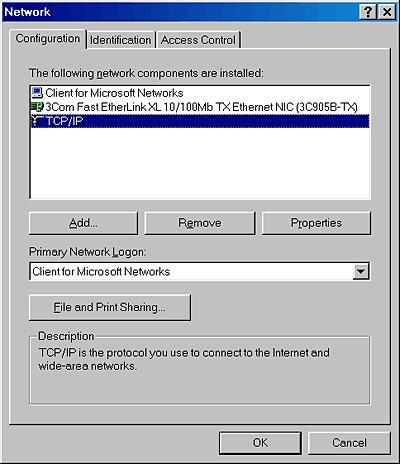
Check that Internet Protocol (TCP/IP) is included in the Local Area Connection Properties list box.
|

If the Internet Protocol (TCP/IP) appears in the list box, proceed to Scanning in a Network Environment; otherwise, proceed to step 5.
|
|
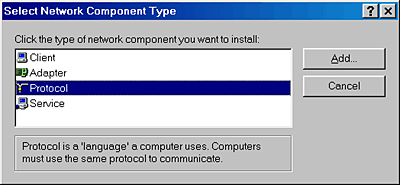
Click Install. The Select Network Component Type dialog box appears.
|
|
|
Select Protocol from the list and click Add.
|
 |
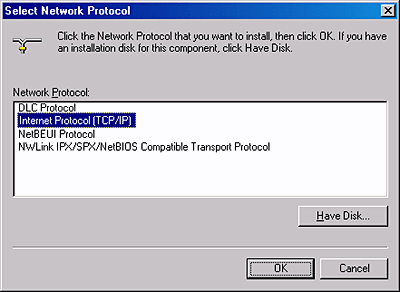
Select Internet Protocol (TCP/IP) in the Network Protocol list box and click OK.
|
For Windows Me and 98 users
|
|
Click Start, point to Settings, and then select Control Panel.
|
Control Panel appears.
|
|
Double-click the Network icon in Control Panel.
|

The Network dialog box appears.
|
|
Click the Configuration tab.
|
|
|
Check that TCP/IP is included in the following installed network components list box.
|
|
|
Click Add.
|
The Select Network Component Type dialog box appears.
|
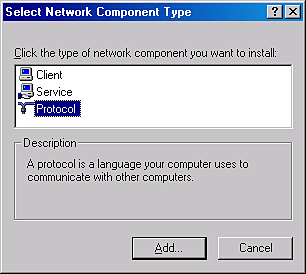
|
Select Protocol from the list, and then click Add.
|
|
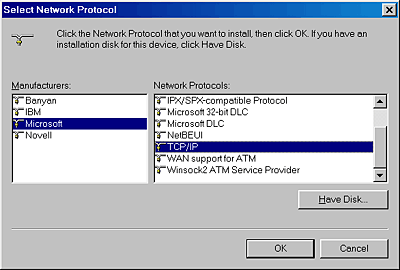
|
Select Microsoft from the Manufacturers list box and TCP/IP from Network Protocols, and then click OK.
|
[Top]
| Version 1.00E, Copyright © 2003, SEIKO EPSON CORPORATION |


