Basic Windows Printing


Printing From an Application

After you create a document in a software program, follow these steps to print it using the basic printer settings:

  1. From the File menu, click Print. You see a Print window like this one:


  2. Make sure EPSON Stylus CX3200 is selected.
  3. Click the Preferences or Properties button.
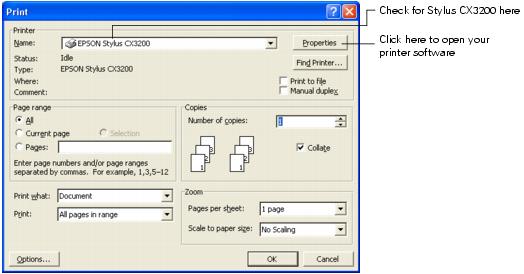
  4. (If you see a Setup, Printer, or Options button, click it. Then click Preferences or Properties on the next screen.)

  5. Select the following settings on the Main tab in your printer settings window:


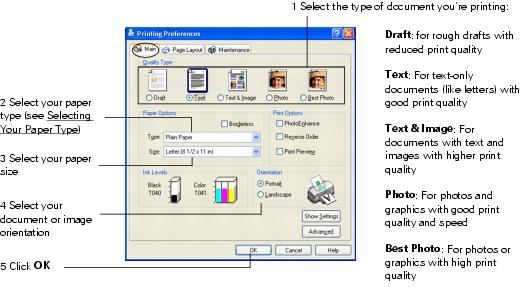
  6. Note: For more information about printer settings, click the ? or Help button.

    The Quality Type settings on this screen give you the best combination of quality and print speed for most prints. For the highest print quality (Photo RPM) on selected papers, click the Advanced button on the Main tab. Then see Customizing Windows Print Settings for instructions on selecting Photo RPM.

  7. You return to the Print window. Click OK or Print to start printing.

During printing, this window appears and shows the progress of your print job. You can use the buttons to cancel, pause, or resume printing. You can also see how much ink you have left.

Selecting Default Settings

Your print settings apply only to the program you're currently using. If you want, you can change the Windows default print settings for all your programs.

  1. Right-click the printer icon in the lower right corner of your screen (taskbar).
  2. Select Printer Settings. You see the window shown in Printing From an Application.
  3. Select the default settings you want for all your applications, then click OK.

You can still change the print settings in your program, if necessary.