If you see a message like this on the display, one or more cartridges are low on ink:
When you see a message like this on the display, you need to replace one or more cartridges:
You cannot print when a cartridge is empty.
Note: You will also see a low ink or ink out message on your computer screen when you print from your computer.
When a cartridge is more than six months old, you may need to replace it if printouts do not look their best. If the quality does not improve after cleaning and aligning the print head, you can replace the cartridge even if you do not see an ink message on the display.
To check your ink supply from your computer, do the following:
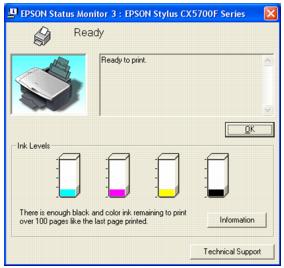
You see a window like this:
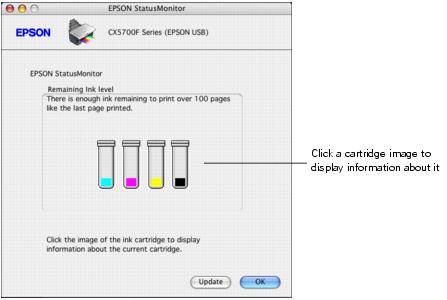
Note:
You can also check the ink levels using the display and buttons on the EPSON STYLUS CX5700F. See the Basics Guide for instructions.
Use these Epson ink cartridges within six months of installing them and before the expiration date on the package.
We recommend that you use genuine Epson cartridges. The use of other products may affect your print quality and could result in printer damage. Yields vary considerably based on images printed, print settings, paper type, frequency of use, and temperature. The printer ships with full cartridges and part of the ink from the first cartridges is used for priming the printer.
Warning:
Keep ink cartridges out of the reach of children.
Be careful when you handle used ink cartridges; there may be ink remaining around the ink supply port. If ink gets on your skin, wash it off with soap and water. If it gets in your eyes, flush them immediately with water.
Caution:
Do not put your hand inside the EPSON STYLUS CX5700F all-in-one or touch any cartridges during printing.
Install a new ink cartridge immediately after removing an empty one. Leaving cartridges uninstalled can dehydrate the print head and may prevent the EPSON STYLUS CX5700F from printing.
If you remove an ink cartridge for later use, protect the ink supply area from dirt and dust and store it in the same environment as the EPSON STYLUS CX5700F. Note that there is a valve in the ink supply port, making covers or plugs unnecessary, but care is needed to prevent the ink from staining items that the cartridge touches. Do not touch the ink cartridge ink supply port or surrounding area.
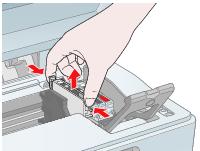
Be sure you have a new ink cartridge before you begin. Once you start replacing a cartridge, you must complete all the steps in one session.
Caution:
Leave the empty cartridge installed until you have obtained a replacement, or the ink remaining in the print head nozzles may dry out.
![]()
![]()
![]()
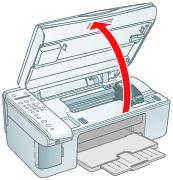
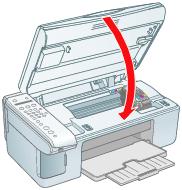
Caution:
Do not open the scanner when the document cover is open.
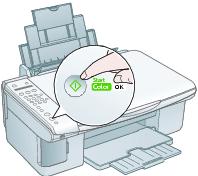
Do not move the print head by hand; this may damage the EPSON STYLUS CX5700F. Always select 5.Replace Cartridge from the display to move it.
Warning:
If ink gets on your hands, wash them thoroughly with soap and water. If ink gets into your eyes, flush them immediately with water.
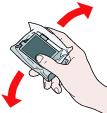
Caution:
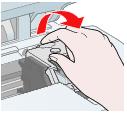
Do not remove or tear the label on the cartridge; otherwise, ink will leak.
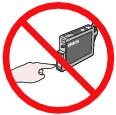
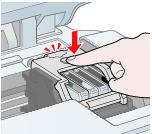
Do not touch the green chip on the front of the cartridge. This can damage the ink cartridge.
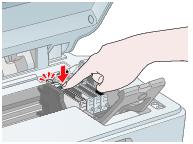
Charging takes about one minute. When it is finished, 5.Replace Cartridge appears on the display.
Caution:
Never turn off the EPSON STYLUS CX5700F while Charging appears on the display or you will waste ink.
Note:
If you see an ink cartridge error message on the display, the ink cartridge may not be installed correctly. Press the OK button and reinstall the ink cartridge until it clicks into place.