![]()
Reference Guide
|
|
Index |
|
Help |
|
Safety | |||||
|
|
Contents |
|
Glossary |
|
||||||
|
|
|
|||||||||||||||||||||||||||||||||
How To
Remove the moiré patterns from a scanned image
EPSON Scan provides you with a variety of settings to improve the quality of a scanned image to satisfy your needs. You can easily adjust the quality of the image by selecting the box in the setting window. In this section, you will get the information on what you can do and how to do it.
You can remove a wavy or ripped pattern called "moiré," which tends to happen in areas of halftone color such as skin color. Follow the steps below to remove these patterns.
| Note: |
|
|
|
|
 |
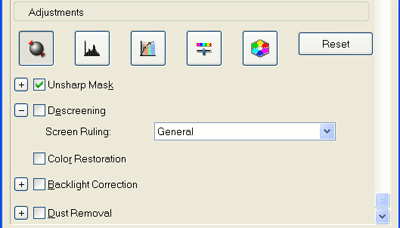
Select the Descreening Filter check box in the Adjustments section. |

 | Select Screen Ruling appropriate for the image being scanned and your purpose. (In the Home Mode, this function is not available.) |
|
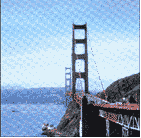
Descreening Filter not applied |
Descreening Filter applied |
 |
 |
If the outline of the original edge of the image is not sharp enough, you can improve the sharpness of the scanned image by using this feature in the Professional Mode. (This feature is automatically enabled in the Home Mode.) Follow the steps below.
| Note: |
|
|
|
Select the Unsharp Mask check box in the Adjustments section. |
|
Unsharp Mask not applied |
Unsharp Mask applied |
 |
 |
|
|
Click the plus sign next to the check box to select the level of adjustments. |
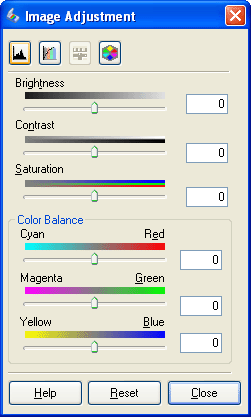
You can improve the color of a scanned image by adjusting the brightness, contrast, saturation, or color balance. Follow the steps below.
| Note: |
|
|
|
Click the |
|
| Adjust the items you want to change by sliding the tabs. |
|
Image Adjustment not applied |
Image Adjustment applied |
 |
 |
 | Close the Image Adjustment window by clicking the Close button. |
Follow the steps in these sections to fine tune the colors in your images using the Color Palette feature in EPSON Scan.
|
|
If necessary, click the Preview button to preview your image. Then click the |
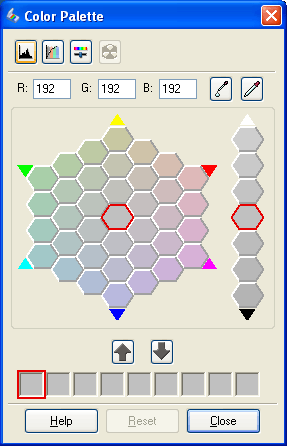
The Color Palette window appears.
| |
Click the |
|
|
In the Preview window, click on the color in your image that needs adjustment. |
The color you selected is moved to the center cell in the Color Palette window with variations in hue in the surrounding cells.
|
|
Select the cell that contains the hue you would like to use to adjust the color in your image. This color now becomes the color of the center cell and the color change is reflected in your image. |
| Note: |
|
|
|
If you want to continue adjusting the color, repeat step 4. |
If you want to save the color for future scans, click the  Save button. The color appears in the save area.
| Note: |
|
|
|
When you are finished adjusting the color, click the Close button to return to the Epson Scan window. |
For further details on using the Color Palette feature, click the Help button.
| |
If necessary, click the Preview button to preview your image. Then click the |
The Color Palette window appears.
|
|
Select the cell that contains the hue you would like to use to adjust the color in your image. This color now becomes the color of the center cell. |
| Note: |
|
|
|
Click the |
|
|
In the Preview window, click on the color in your image that needs adjustment. The color change is reflected in your image. |
|
|
If you want to continue adjusting the color, repeat steps 2 through 4. |
If you want to save the color for future scans, click the Save button. The color appears in the save area.
| Note: |
|
|
|
When you are finished adjusting the color, click the Close button to return to the EPSON Scan window. |
For further details on using the Color Palette feature, click the Help button.
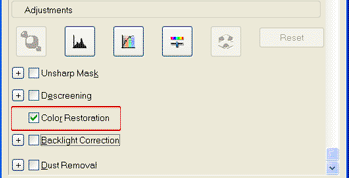
Color Restoration is a scanner software feature that restores faded color on film and photos. Select the Color Restoration check box to restore color in the Home Mode or Professional Mode.
| Note: |
|
|
|
|
Using the Dust Removal feature in EPSON Scan, you can virtually “clean” the dust from your originals as you scan them.
| Note: |
|
|
|
Click the Dust Removal check box in the Adjustments section. |

|
|
Click the plus sign next to the check box and select the level of dust removal. |
| Note: |
|
Using the Backlight Correction feature in EPSON Scan, you can remove shadows from photos that have too much background light. You can fix photos automatically as you scan them.
|
|
Click the Backlight Correction check box in the Adjustments section. |
Backlight Correction not applied |
Backlight Correction applied |
 |

|

|
|
Click the plus sign next to the check box and select the level of backlight correction. |
 Previous |
 Next |
| Version 1.00E, Copyright © 2003, SEIKO EPSON CORPORATION |
 Color Palette button.
 Color Applicator button. Your cursor changes to a droplet.