 |
|
|||
 |
||||
Installing the Automatic Document Feeder
Whenever you want to use the ADF, you need to remove the scanner cover and replace it with the ADF.
 Warning:
|
The ADF is heavy so you may need to have someone help you lift it.
|
 Note:
Note:|
The ADF is large, so you should clear sufficient space around the scanner.
|
 |
Make sure the scanner is turned off, then unplug the power cord.
|
 |
Remove the scanner cover. See Placing Large or Thick Documents for instructions.
|
 |
Remove the tape and other packing materials from the ADF.
|
 |
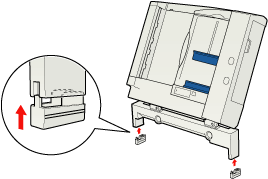
Attach the two smaller feet. (The smaller feet have grooves on their sides.)
|
 Note:
Note:|
When removing the feet, turn and remove them as shown.
 |
 |
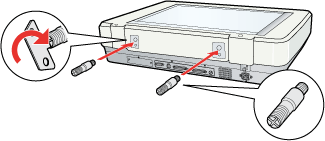
Insert the installation screws that come with the ADF into the holes in the back of the scanner and secure them using the included screwdriver.
|
 |
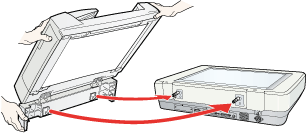
Align the installation screws with the holes in the ADF. Slide the holes over the installation screws.
|
 Warning:
|
The ADF is heavy. Ask for assistance when lifting it.
|
 |
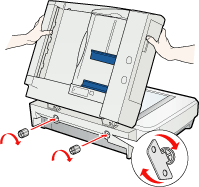
Secure the knobs to the ends of the installation screws using the included screwdriver.
|
 |
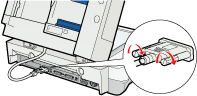
Connect the ADF cable to the scanner’s ADF connector.
|
 |
Close the ADF.
|
 |
Connect the power cord to the scanner and then turn on the scanner.
|
To load documents into the ADF, see Loading Documents in the Automatic Document Feeder.