To purchase the optional battery, check with your PictureMate retailer or go to MyPictureMate.com. You can also order the battery from the Epson Store at www.epsonstore.com (U.S. sales only). In Canada, please call (800) 463-7766 for dealer referral. In Latin America, contact your nearest Epson sales office or go to www.latin.epson.com. See Where To Get Help for more information on obtaining the battery.
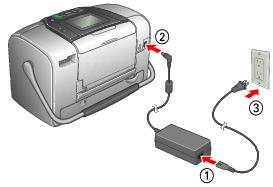
After you install the battery, you need to charge it by connecting the AC adapter and plugging in the printer.
The power light flashes while the battery is charging (when PictureMate is turned off). It takes about 2 hours to fully charge the battery when PictureMate is off. It takes longer when you use PictureMate while it is charging.
The power light turns off when the battery is fully charged (if PictureMate is turned off).
The following battery status icons appear in the upper right corner of the photo viewer screen:
You can print from 50 to 80 photos with a fully charged battery.
When you are using the battery, PictureMate will automatically turn off after 15 minutes if it is not being used, unless it has a memory card inserted and it is connected to your computer. Press the ![]() On button to turn it back on.
On button to turn it back on.
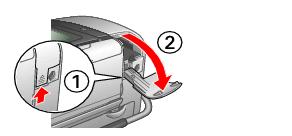
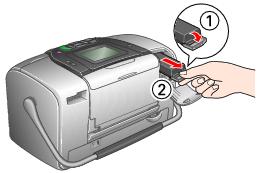
If you want to change batteries, or there is a problem with your battery, you may need to remove it.