Copying Photos to and From Your Computer
If you've taken digital photos with your camera, you can insert the memory card into a PictureMate memory card slot and copy the photos to your computer. You can also copy photos from your computer to the card. You can access memory cards in the same way as any drive on your computer.
Follow the steps in these sections:
Compatible Memory Cards
You can insert any of these types of memory cards into PictureMate:
- CompactFlash(TM) Type I and II
- Microdrive(TM)
- SD(TM) (Secure Digital)
- miniSD(TM) (requires miniSD adapter)
- MMC(TM) (MultiMediaCard)
- xD Picture Card(TM)
- Sony Memory Stick®
- Memory Stick Duo(TM) (requires Memory Stick Duo Adapter)
- Memory Stick PRO(TM)
- Memory Stick PRO Duo(TM) (requires Memory Stick Duo Adapter)
- MagicGate(TM) Memory Stick
- MagicGate Memory Stick Duo(TM) (requires Memory Stick Duo Adapter)
- SmartMedia(TM)
Photo Image File Requirements
Make sure the photo image files on your memory card meet these requirements:
- JPEG files or uncompressed Tiff files only
- Resolutions ranging from 120 × 120 to 4600 × 4600 pixels
Your PictureMate recognizes and prints the first 999 photos on your memory card.
Note: PictureMate supports P.I.M. (PRINT Image Matching) and Exif Print image enhancement features. See your camera manual to see if these features are included on your camera. PictureMate does not support progressive-scan JPEG or RAW images.
Most digital cameras create JPEG files. See your camera manual for details.
Inserting Your Memory Card and Copying Photos
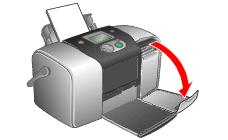
- Make sure PictureMate is on, then flip down the memory card door.
- Insert the memory card into its slot, as shown.

- Push the card in until it stops (it won't go in all the way). When the card is in, the memory card light comes on.

- Close the memory card door.
Note: Insert just one card at a time. PictureMate can't read multiple cards at once.
What happens with your photos when your computer detects them depends on the type of system you have.
Windows XP
You may see a screen like this:
You can choose any of the options to copy, view, or print your photos.
- To copy photos to your computer, select Copy pictures to a folder on my computer and click OK. Follow the on-screen instructions to select a folder for your photos and copy them.
- To copy photos from your computer to the card, select Open folder to view files and click OK. Then drag and drop the photos to the card folder. Make sure the photo files meet the requirements described in Photo Image File Requirements.
If you want to copy files from Adobe Photoshop, make sure you save them as RGB images using the standard save option (non-progressive). Files saved in the CMYK format may not print with the colors you expect. PictureMate can't print files saved as progressive scans.
When you're done copying photos, carefully prepare your computer before removing your memory card, as described in Preparing to Remove a Memory Card.
Windows 2000, Me, or 98SE
- If this is the first time you've inserted a memory card, you see the message below. Follow the instructions in Configuring PhotoStarter to respond to the message.

Note: With Windows 2000, make sure you've installed Service Pack 4 or later or the CardMonitor utility won't launch when you insert a memory card.
- PhotoStarter opens and automatically copies your photos to the Photos folder on your desktop.
- To copy photos from your computer to the card, drag and drop the photos to the card folder. Make sure the photo files meet the requirements described in Photo Image File Requirements.
If you want to copy files from Adobe Photoshop, make sure you save them as RGB images using the standard save option (non-progressive). Files saved in the CMYK format may not print with the colors you expect. PictureMate can't print files saved as progressive scans.
When you're done copying photos, carefully prepare your computer before removing your memory card, as described in Preparing to Remove a Memory Card.
Macintosh
A drive icon appears on your desktop (the drive name is determined by your digital camera). You can open the drive and copy the photos from the card to your computer, or from your computer to the card.
- If you have iPhoto and you have it set to open when a digital camera is connected, it opens when you insert a memory card. Click the Import button to copy photos to your Macintosh. See iPhoto Help for more information.
- If you don't have iPhoto, you need to set up Image Capture to use Epson CardMonitor as described in Configuring CardMonitor.
When you're done copying photos, carefully prepare your computer before removing your memory card, as described in Preparing to Remove a Memory Card.
Configuring PhotoStarter
Follow these steps to set up PhotoStarter to copy photos to your computer:
- When you see this message, click Next.
The PhotoStarter setup assistant opens:

- Click Next again. The setup assistant asks you a series of questions about how you want PhotoStarter to work.
The default settings cause the following to occur whenever you insert a memory card:
- PhotoStarter copies your pictures to the Photos folder on your desktop.
- The pictures are stored in folders by date.
- Film Factory opens automatically.
Tip: Film Factory lets you view, modify, and print photos quickly and easily. For instructions on using it, see Printing Photos Using Film Factory.
- Change any of the settings you want, then click Next. When you see the Confirmation window, click End.
You can go back and change settings at any time by opening PhotoStarter:
- In Windows, click Start, point to Programs (or All Programs), Film Factory, and click EPSON PhotoStarter3.0. Open the Settings menu and choose Change Settings.
- On a Macintosh, open the EPSON PhotoStarter folder, then double-click EPSON PhotoStarter. Open the Tools menu and choose Change Settings.
Configuring CardMonitor
Follow these steps to configure Epson CardMonitor in the Macintosh OS X Image Capture utility:
- Open the Applications folder and double-click Image Capture.
- Open the Image Capture menu and select Preferences.
- From the Camera Preferences list, select Other. A new Applications folder opens.
- Open the Epson CardMonitor folder, select Epson CardMonitor, and click the Open button.
- Close the Image Capture utility. CardMonitor will now open automatically when you insert a memory card. Follow the on-screen instructions.
Preparing to Remove a Memory Card
Once you're finished copying photos to or from your memory card, follow the steps below to remove it. Be sure to remove any cards before unplugging the USB cable from PictureMate.
Caution: Do not eject a card while the memory card light is flashing, or without performing the steps described below, or you may lose photos on the card. Be sure your memory card has been removed before unplugging the USB cable.
- Do one of the following, depending on your operating system:
- If you're using Windows XP or 2000, click the
 Unplug or Eject Hardware icon on the taskbar.
In Windows XP, click Safely Remove USB Mass Storage Device.
In Windows 2000, click Stop USB Mass Storage Device.
- For Windows 98 or Me, make sure the card light on PictureMate is not flashing.
- On a Macintosh, drag the memory card icon from your desktop to the trash.
- To remove a card, pull it straight out of the PictureMate slot.
