- Push in the output tray extension, but leave the tray open.
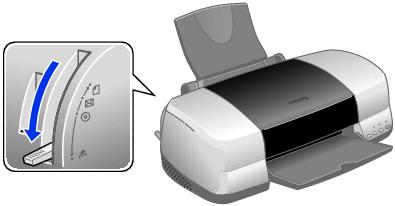
- Set the paper thickness lever to the
 position. The
  paper light begins flashing rapidly.
 - Slide the edge guide to the right to make room for the card stock.
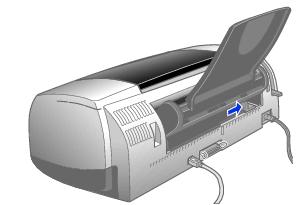
- Open the printer cover and place a sheet of card stock against the left side of the manual feed slot, with the side you want to print on facing up.
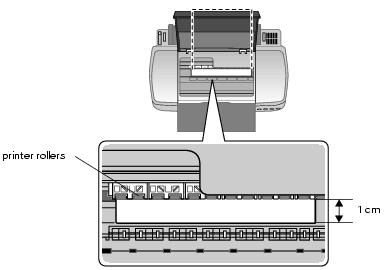
- Slide the card stock into the printer until the leading edge is 1 cm (0.4 inches) from the gray rollers.
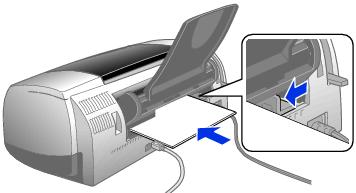
- Slide the edge guide against the card stock.
- Set the paper thickness lever to the
 position. (If the print quality is not satisfactory, try setting the paper thickness lever to the
  position for the next print.)
 - Close the printer cover and press the
button to feed the card stock into the printer.
- Before you print, make sure you select Manual or Manual Feed as the paper source in your printer software (See Printing in Windows or Printing on Macintosh).

If you're using the manual feed slot to print on paper rather than card stock, set the paper thickness lever to the ![]() position.
position.
Note: If the ![]() paper light flashes, make sure the paper thickness lever is set correctly, then press the
paper light flashes, make sure the paper thickness lever is set correctly, then press the ![]() button again.
button again.