|

Reference Guide
|
|
Setting Your Materials for Scanning
Placing Films
 35 mm film strips
 35 mm slides
 Medium Format
 4 x 5 inch film
You can scan 35 mm film strips, 35mm slides, Medium Format films, and 4 x 5 inch films. Your document cover also functions as the Film Adapter (transparency unit).
 |
Caution:
|
 | |
Hold the film at its edges, or else use gloves. Touching the film surface with bare hands can leave fingerprints or other traces on the film.
|
|
 |
Note:
|
 |
In the Full Auto Mode, you can scan 35 mm color film and 35 mm color slides. If you want to scan monochrome negative film, Medium Format film, or 4 x 5 inch film, switch to the Home Mode or Professional Mode.
|
|
 |
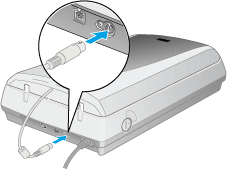
Make sure the document cover's cable is connected to the scanner's accessory interface connector.
|
 |  |
Note:
|
 |  | |
Before connecting or disconnecting the document cover's cable, make sure the scanner is turned off.
|
|
 |
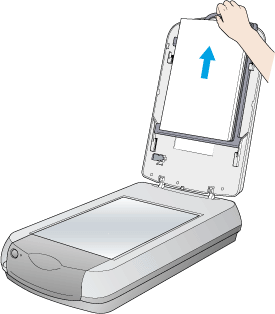
Open the document cover and slide up the reflective document mat gently to remove it.
|
 |
Load the films or slides into the film holder and position it on the document table. Go to the section listed below that matches the type of material you want to scan.
|
35 mm film strips
35 mm slides
Medium Format
4 x 5 inch film
 |  |
Note:
|
 |  | -
The base side of the film is the side where the film maker's name and film ID numbers can be read correctly. Also, when you look at an image on the film from the base side, the image should appear normally, not as the reverse of it.
|
|
 |  | -
Set the film correctly in the film holder and position the film holder properly on the document table.
|
|
 |  | -
Do not press the glass of the document table with too much force.
|
|
 |  | -
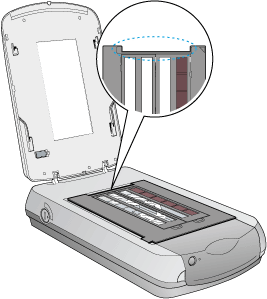
Leave the part of the film holder shown below uncovered; otherwise the colors in your scans will be affected.
|
|
 |
Close the document cover.
|
 |
Note:
|
 | -
Make sure the document cover is completely closed; otherwise you cannot obtain proper colored images.
|
|
 | -
A newton ring (ring-shaped stripes pattern) may appear in the scanned image. To remove the newton ring, set the film with the base side facing up. For details, see Newton ring appears in the scanned image.
|
|
35 mm film strips
 |
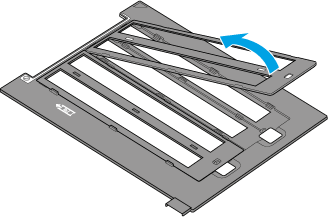
Open the cover of the 35 mm film holder.
|
 |
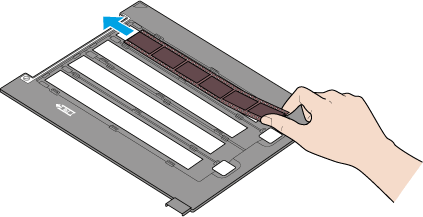
Slide the edge of the strip in the film holder, base side facing down. Then place it so that all of the frame is positioned inside the film holder. You can set up to 24 frames into this film holder.
|
 |
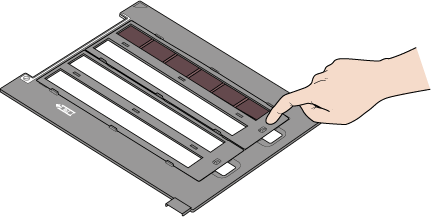
Set the cover on the film and press until you hear a click.
|
 |  |
Note:
|
 |  | |
Press around the entire perimeter of the cover to make sure it is secured.
|
|
 |
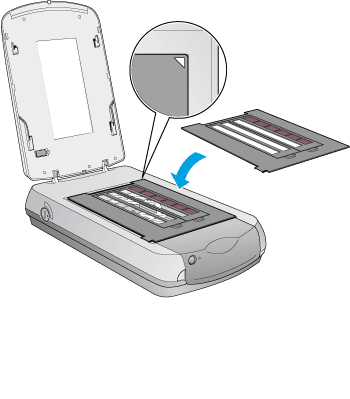
Place the film holder on the document table so that it is aligned with the upper right corner of the document table.
|

[Top]
35 mm slides
 |
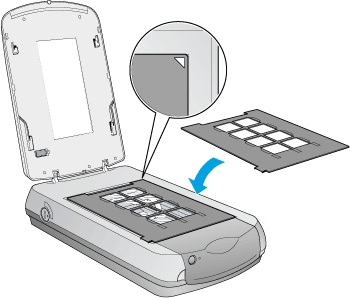
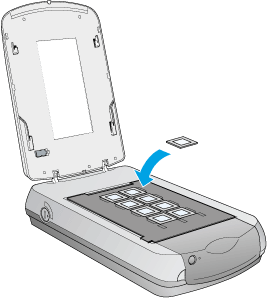
Place the 35 mm slide holder on the document table so that it is aligned with the upper right corner of the document table.
|
 |
Place slides in the holder, as shown below.
|

[Top]
Medium Format
 |
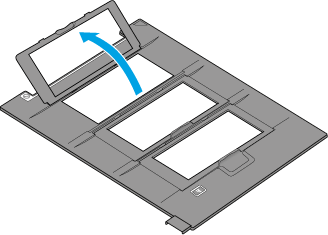
Open the cover of the medium format film holder.
|
 |
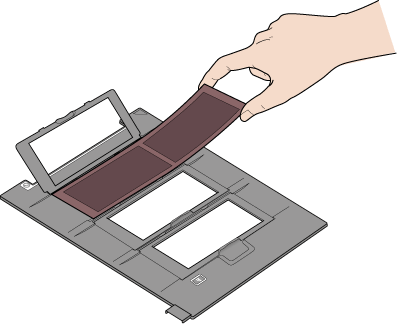
With the base side facing down, place the film on the film holder with the entire frame positioned inside the film holder opening. The maximum film size that you can place on this film holder is 2.4 x 4.7 inches (6 x 12 cm).
|
 |
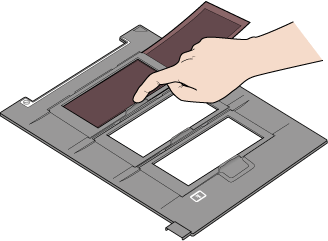
Set the cover on the film and press until you hear a click.
|
 |  |
Note:
|
 |  | |
Press around the entire perimeter of the cover to make sure it is secured.
|
|
 |
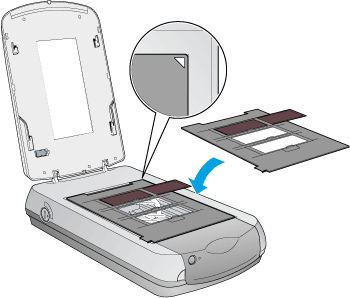
Place the film holder on the document table so that it is aligned with the upper right corner of the document table.
|

[Top]
4 x 5 inch film
 |
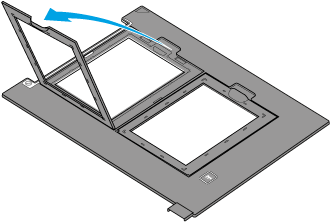
Open the cover of the 4 x 5 inch film holder.
|
 |
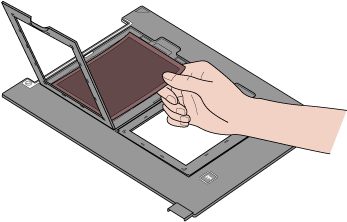
With the base side facing down, place the film on the film holder with the entire frame positioned inside the film holder opening.
|
 |
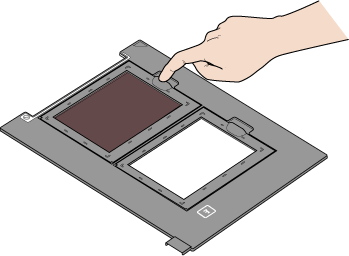
Set the cover on the film and press until you hear a click.
|
 |  |
Note:
|
 |  | |
Press around the entire perimeter of the cover to make sure it is secured.
|
|
 |
Place the film holder on the document table so that it is aligned with the upper right corner of the document table.
|
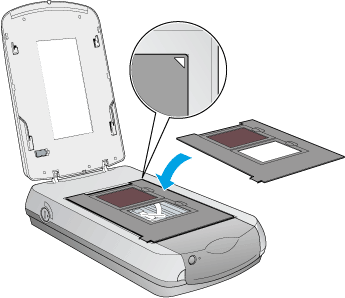
For the detailed scanning procedure, see For films.

[Top]
| Version 1.00E, Copyright © 2003, SEIKO EPSON CORPORATION |
![]()
35 mm film strips
35 mm slides
Medium Format
4 x 5 inch film


