|

Reference Guide
|
|
Other Information
Loading Single Sheets of Paper
 Loading Thick Paper
Follow the steps below to load paper into the printer.
 |
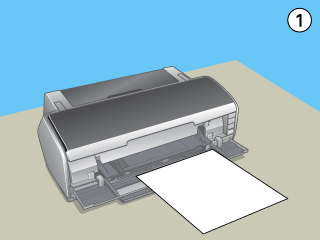
Open the paper support, then slide out the paper support extension.
|
 |
Make sure the output tray is fully extended, and the output tray extension is fully slid out.
|
 |
Position the left edge guide so that the distance between the two edge guides is slightly wider than the width of your paper.
|
 |
Fan a stack of paper, then tap it on a flat surface to even the edges.
|
 |
Load the paper with the printable side up so it is against the right edge guide, and slide it into the sheet feeder. Then slide the left edge guide against the left edge of the paper.
|

During printing the left edge guide automatically moves 3 mm to the left. Do not move it back manually
 |  |
Note:
|
| | -
Leave enough space in front of the printer for the paper to be fully ejected.
|
|
| | -
Always load paper into the sheet feeder short edge first.
|
|
| | -
Make sure that the paper stack is flush with or lower than the triangular load-limit mark on the edge guide.
|
|
| |
-
Make sure you use the "Matte Sheet Support" when loading more than two sheets of thick paper larger than A4 size. For instructions on how to attach the "Matte Sheet Support," See the following section.
 See Attaching the Matte Sheet Support. See Attaching the Matte Sheet Support.
|
|
Loading Thick Paper
Follow the steps below to load thick paper into the front manual feed slot. You can use thick paper with a thickness of 1.2 mm, and from size 20 x 25 cm (8 x 10 in) to Super B.
 |
Caution:
|
|
-
If you load the thick paper incorrectly you may damage the printer.
|
|
|
-
Be sure to insert the thick paper following the steps described below. If you insert the thick paper in a different way (for example, if you insert the thick paper into the printer and then turn the power off and then back on), the printer may be damaged.
|
|
|
-
Be sure to remove the roll paper holder when printing on thick paper. Otherwise, the paper is ejected and a paper jam error occurs.
|
|
|
|
Make sure that the printer is on and the power light is not flashing.
|
| |
Caution:
|
| |
|
Be sure to insert the thick paper while the power is on. Otherwise, automatic print position adjustment may not take place.
|
|
|
|
Open the top printer cover. Then open the front printer cover completely.
|

|
|
Close the top printer cover.
|
|
|
Load the thick paper with the printable side facing up.
|
| |
Note:
|
| |
|
Only print one sheet of thick paper at a time.
|
|
|
|
Slide the thick paper into the printer until the back edge is level with the alignment arrow on the front manual feed slot.
|
 |
Slide the left edge guide against the left edge of the thick paper.
|
 |
Press the  paper button. The paper is set automatically. When the paper button. The paper is set automatically. When the  power light stops flashing, the operation is complete. power light stops flashing, the operation is complete.
|
| |
Note:
|
| |
|
Since the paper feeds through the printer from the front to the rear, make sure there is enough space at the rear of the printer for the paper to move completely.
|
|

[Top]
| Version 1.00E, Copyright © 2003, SEIKO EPSON CORPORATION |

