|

Reference Guide
|
|
Printing / Improving the Print Quality
Aligning the Print Head
 For Windows
 For Mac OS 9
 For Mac OS X
 Using the control panel buttons
If you notice a misalignment of vertical lines or horizontal banding, you may be able to solve this problem from your computer using the Print Head Alignment utility in your printer software or from this product itself by using the control panel buttons. Refer to the appropriate section below.
 |
Note:
|
 |
Do not press the  Stop button to cancel printing while printing a text pattern with the Print Head Alignment utility. Stop button to cancel printing while printing a text pattern with the Print Head Alignment utility.
|
|
For Windows
Follow the steps below to align the print head using the Print Head Alignment utility.
 |
Make sure that A4 or Letter size plain paper is loaded in the sheet feeder.
|
 |
Make sure that this product is on.
|
 |
Access the printer driver.
|
 |
Click the Maintenance tab, then click the Print Head Alignment button.
|
 |
Follow the on-screen instructions to align the print head.
|

[Top]
For Mac OS 9
Follow the steps below to align the print head using the Print Head Alignment utility.
 |
Make sure that A4 or Letter size plain paper is loaded in the sheet feeder.
|
 |
Make sure that this product is on.
|
 |
Access the Print or Page Setup dialog box.
|
 |
Click the  Utility icon button, then click the Print Head Alignment button. Utility icon button, then click the Print Head Alignment button.
|
 |
Follow the on-screen instructions to align the print head.
|

[Top]
For Mac OS X
Follow the steps below to align the print head using the Print Head Alignment utility.
 |
Make sure that A4 or Letter size plain paper is loaded in the sheet feeder.
|
 |
Make sure that this product is on.
|
 |
Access the EPSON Printer Utility dialog box.
|
 |
Click the Print Head Alignment button in the Utility dialog box.
|
 |
Follow the on-screen instructions to align the print head.
|

[Top]
Using the control panel buttons
Follow the steps below to align the print head using the control panel.
 |
Note:
|
 |
Do not press the  Stop button to cancel printing while printing an alignment pattern. Stop button to cancel printing while printing an alignment pattern.
|
|
 |
Make sure that A4 or Letter size paper is loaded in the sheet feeder and press the Setup button.
|
 |
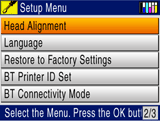
Select Head Alignment.
|
 |
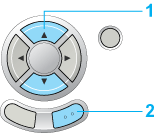
1. Select Head Alignment.
|
 |
2. Press the OK button.
|
 |
Confirm the messages on the LCD panel, then press the OK button to start Head alignment.
|
 |
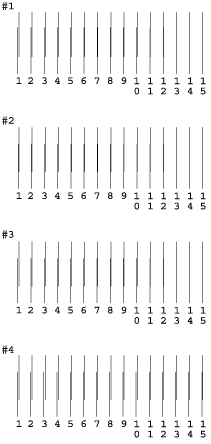
The following alignment sheet is printed.
|
 |
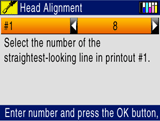
From the alignment pattern in set #1 on the printed test sheet, choose the vertical line that is aligned best.
|
 |
Select the corresponding line number and press the OK button.
|
 |
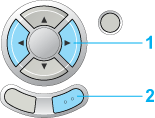
1. Choose the vertical line that is aligned best.
|
 |
2. Press the OK button.
|
 |
Repeat step 5 and 6 for the alignment patterns in sets #2, #3 and #4.
|
 |
Press the OK button to finish.
|

[Top]
| Version 1.00E, Copyright © 2003, SEIKO EPSON CORPORATION |
![]()
For Windows
For Mac OS 9
For Mac OS X
Using the control panel buttons


 Utility icon button, then click the Print Head Alignment button.


