|

Reference
Guide
|
|
How To / Setting Up Your Printer on a Network
For Windows 95 and 98 Users
 Setting up your printer as a shared printer
 Accessing the printer through a network
This section tells you how to set up your printer so that other computers on the network can use it. When using EPSON Stylus COLOR 480 as a shared printer, only the computer which is directly connected to the printer can be used to perform such operations as replacing ink cartridges and removing jammed paper. Computers that are connected to the printer through a network are limited to certain operations.
First, you need to set up the printer as a shared printer on the computer to which the printer is connected. Then, you must specify the network path to the printer from each computer that will use it, and install the printer software on those computers.
 |
Note:
|
 |
This section describes how to use your printer as a shared printer on a network. To connect your printer directly to a network without setting it up as a shared printer, consult your network administrator.
|
Setting up your printer as a shared printer
Follow these steps to share a printer connected directly to your computer with other computers on a network.
 |
Click Start, point to Settings, then click Control Panel.
|
 |
Double-click Network.
|
 |
Click the File and Print Sharing button.
|
 |
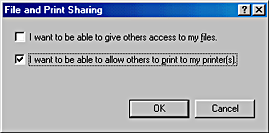
Select the I want to be able to allow others to print to my printer(s) check box and click OK.
|

 |
In the Network dialog box, click OK.
|
 |
In the Control Panel, double-click Printers.
|
 |  |
Note:
|
 |  | -
If a dialog box requesting the Windows 98 or 95 CD-ROM appears, insert the CD-ROM in the CD-ROM drive, then follow the messages on the screen.
|
 |  | -
If a dialog box appears requesting you to restart your computer, do so. Then open the Printers folder, and continue from step 7.
|
 |
Select your printer in the Printers folder, and click Sharing on the File menu.
|
 |
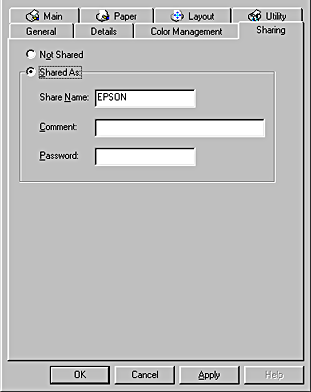
Select Shared As and type the printer information as necessary, then click OK.
|


[Top]
Accessing the printer through a network
To access your printer from another computer on the network, follow these steps.
 |
Note:
|
 |
On the computer from which you want to access the printer, click Start, point to Settings, and click Printers.
|
 |
Double-click the Add Printer icon.
|
 |
The Add Printer Wizard screen appears. Click Next.
|
 |
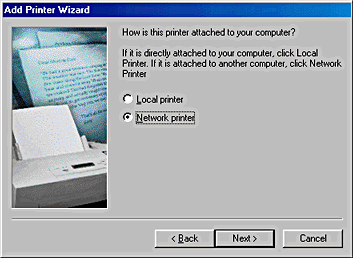
Select Network printer, then click Next.
|

 |
Click Browse.
|
 |
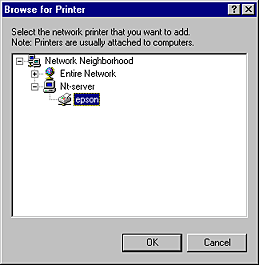
Double-click the icon of the computer that is directly connected to the printer. Then click the printer's icon.
|

 |
Click OK and follow the messages on the screen.
|

[Top]
| Copyright © SEIKO EPSON CORPORATION 2000, ALL RIGHTS RESERVED |
Setting up your printer as a shared printer
Accessing the printer through a network