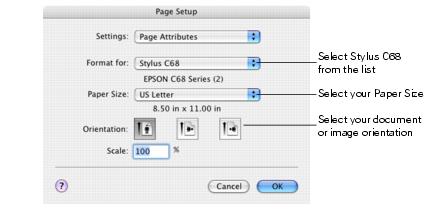
- Open the File menu and select Page Setup. You see the Page Setup window:
- Select Stylus C68 in the Format for pop-up menu.
- Select your Paper Size. For borderless printing, select a paper size with the Sheet Feeder - Borderless option. See Printing Borderless Photos for details.
- Select
 portrait or
  landscape as the orientation setting.
 - Click OK.
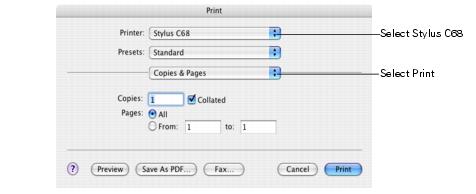
- Open the File menu and select Print. You see a window like this one:
- Select Stylus C68 in the Printer pop-up menu.
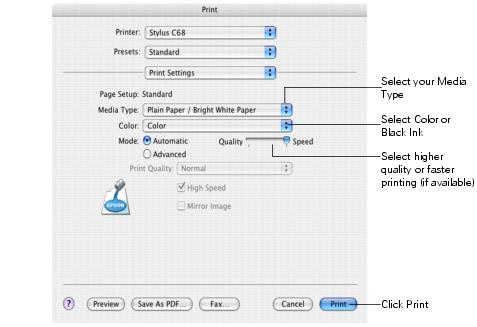
- Select Print Settings from the pop-up menu.
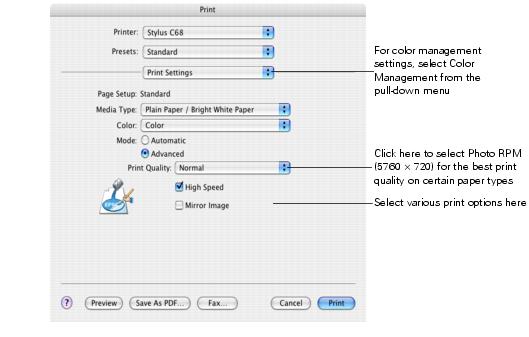
- Select the following Print Settings as necessary:
- Depending on your settings, you can choose other options from the pop-up menu:
- Copies & Pages: Select the number of copies you want or a page range.
- Layout: Select page layout options.
- Output Options: Save your print job as a PDF file.
- Scheduler: Schedule your print job to print at a later time.
- Paper Handling: Select page printing options, such as Reverse print order.
- ColorSync or Color Management: Select ColorSync,® or adjust the color controls, change the gamma setting, or turn off color adjustments in the printer software.
- Expansion: Reduce or enlarge the image size for borderless printing. See Printing Borderless Photos for details.
- Summary: View a list of all your selections.
- To save your selections for future use, select Save As from the Presets pop-up menu.
- Click Print.
- To monitor the progress of your print job, click the
 printer icon when it appears in the dock on the bottom of your desktop.
 - When you're finished, close the printer window or Print Center.
Note:
For more information about printer settings, click the ? button.
The Quality setting on this screen gives you the best combination of quality and print speed for most prints. For the highest print quality (Photo RPM) on selected papers, click Advanced and see Customizing Mac OS X Print Settings.
If you're using OS X 10.2.x, click the ![]() Print Center icon instead, then double-click Stylus C68 in the Printer List window.
Print Center icon instead, then double-click Stylus C68 in the Printer List window.
You see a screen like this:
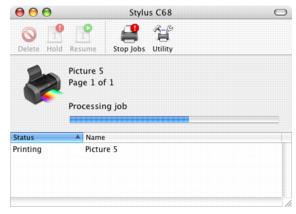
If necessary, you can do one of the following while monitoring the progress of your print job: