Printing from a Card
The Stylus Photo RX500 lets you print photos directly from your digital camera's memory card-you don't even have to connect the Stylus Photo RX500 to a computer.
If your memory card contains photos taken with a camera that supports DPOF (Digital Print Order Format), you can pre-select the photos you want to print while the card is still in the camera.
Printing an Index Form
In most cases, you'll want to print an index form before printing any photos in your memory card. An index form lets you see small thumbnail images of the pictures on your card and select the ones you want to print.
- Make sure your Stylus Photo RX500 is not connected to your computer (or your computer is turned off), then insert a memory card (see Inserting and Removing Cards).
Once the card is inserted, the Stylus Photo RX500 reads and displays the number of printable images on the card (only images in a compatible JPEG or TIF file format are detected).

- Press the Memory Card button on the control panel to enter memory card mode.
- Press the top left button (next to Found Images in the illustration above) until Print Index appears, then press OK.
- Load several sheets of plain, letter-size paper. (If there are more than 36 images on the card, you will need multiple sheets to print the index.)
- Press the x Color button to print the index. After the index form prints, Scan Index appears on the LCD screen.
Selecting Photos To Print
You can select the photos you want to print either by filling in the ovals on the index form and scanning the form (Selecting Photos on the Index Form), or by selecting a photo or range of photos from the control panel (Selecting Photos from the Control Panel).
Selecting Photos on the Index Form
- Once you have printed the index form, fill in the oval beneath each photo you want to print with a dark pen or pencil.

- Near the bottom of the form, select the type and size of paper you want to use. You can select from these options:
|
Option
|
Available paper types
|
|
Prem. Glossy - 4 × 6
Prem. Glossy - Letter
Prem. Glossy - 8 × 10
|
EPSON Premium Glossy Photo Paper
EPSON Premium Semigloss Photo Paper
|
|
Glossy - Letter
Glossy - 4 × 6
|
EPSON Photo Paper
EPSON Glossy Photo Paper
|
|
Matte - Letter
|
EPSON Matte Paper Heavyweight
EPSON Double-Sided Matte Paper
|
- Load the type of paper you've chosen to print on (see Loading Paper).
- Make sure Scan Index appear on the LCD screen, then press OK. (If it doesn't appear, press the Memory Card button, then press the top left button on the LCD screen until you see Scan Index, then press OK.)
- Place the index form face-down on the scanner glass, so that the top of the form is aligned against the left edge of the glass (see Placing Your Original Document).
- Press the x Color button. The form is scanned and your photos are automatically printed.
Selecting Photos from the Control Panel
- Once you've printed the index form, identify a photo or range of consecutive photos you want to print.
- Make sure you're in memory card mode (if necessary, press the Memory Card button).
- Press the top left button next to the LCD screen to select One image, Range of images, or All images, then press OK.
- If you want to print one image or a range of images, follow the instructions on the LCD screen and use the number keypad to select the images you want to print. Then press OK.
- Enter the number of copies of each photo you want to print (up to 999), then press OK.
Note: The number of copies is how many times each photo prints, not the number of pages. For example, if you're using a layout that fits 8 photos and you select 3 copies, you will get one sheet with 3 photos printed on it.
Note: The number of pages cannot be selected; it is determined automatically by your chosen layout and number of copies.
- Press the x Color button. Your photos are printed.
Printing with DPOF
Follow these steps if you've already selected the photos you want to print using your camera's DPOF feature.
- Press the Memory Card button to enter memory card mode.
- Using the number keypad, enter the number of copies of each photo you want to print (up to 999), and press OK.
Note: The number of copies is how many times each photo prints, not the number of pages. For example, if you're using a layout that fits 8 photos and you select 3 copies, you will get one sheet with 3 photos printed on it. Select 8 copies to put all 8 photos on one sheet.
- Change any print settings, as needed. You can select the paper type, paper size, and layout. See Choosing Print Settings for details.
- Press the x Color button. Your photos are printed.
Choosing Print Settings
Before printing your photos, you may need to adjust some of these settings.
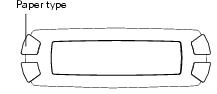
Paper Type
If you've loaded special paper, use this button to select one of the paper type settings listed below:
|
If you have loaded this kind of paper...
|
Select this setting...
|
|
Plain paper
EPSON Premium Bright White Photo Paper
EPSON Photo Quality Ink Jet Paper
|
Plain
|
|
EPSON Matte Paper Heavyweight
EPSON Double-Sided Matte Paper
Premier Art Matte Scrapbook Paper for EPSON
|
Matte
|
|
EPSON Photo Paper
EPSON Glossy Photo Paper
EPSON All-Purpose Glossy Paper
EPSON Glossy Photo Greeting Cards
|
Glossy
|
|
EPSON Premium Glossy Photo Paper
|
Prem. Glossy
|
|
EPSON Premium Semigloss Photo Paper
EPSON Semigloss Scrapbook Photo Paper
|
Semigloss
|
|
EPSON Premium Luster Photo Paper
|
Prem. Luster
|
|
EPSON ColorLife Photo Paper
|
ColorLife
|
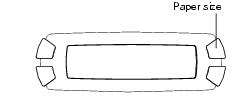
Paper Size
Use this button to select the size of paper you've loaded. Choose one of these sizes: LTR (letter), 4 × 6, 5 × 7, 8 × 10. (Some sizes are not available, depending on the selected paper type.)
Note: The 4 × 6 paper size option is not compatible with Glossy Photo Paper, 4 × 6 inches, with micro-perforated edges (S041134 and S051671).
Layout
Use this button to select one of these layout settings
:
|
Setting
|
Results
|
|
B-Free
|
Prints without margins so that the image covers the whole page.
|
|
1-up
2-up
4-up
8-up
20-up
80-up
|
Prints one or more photos per sheet. For example, 8-up makes up to 8 photos print per sheet (but the actual number depends on the selected number of copies, so select 8 copies if you want to print 8 photos on one sheet).
The size of each photo is adjusted automatically for the layout and paper size.
|
|
Upper1/2
|
Prints only on the upper half of each sheet
|
Resolution
- Press the Menu button. You see this screen:
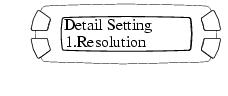
- Press OK. Then press the bottom left button (next to Resolution) to choose from these settings:
|
Setting
|
Results
|
|
Best
|
Prints at 720 × 720 dpi
|
|
Photo
|
Prints at 1440 × 720 dpi
|
Color Effect
- Press the Menu button, then press the bottom left button (next to Resolution) until you see Color Effect on the screen.
- Press OK. Then press the bottom left button to choose from these settings:
|
Setting
|
Results
|
|
Color
|
Prints in color or grayscale
|
|
Sepia
|
Prints with a sepia tone
|
Auto Correct
- Press the Menu button, then press the bottom left button (next to Resolution) until you see Auto Correct on the screen.
- Press OK. Then press the bottom left button to choose from these settings:
|
Setting
|
Results
|
|
P.I.M. (PRINT Image Matching)
|
Prints using PRINT Image Matching information for improved image quality. Your digital camera must support PRINT Image Matching technology.
|
|
Exif
|
Prints using Exif Print information for improved image quality.
|
|
Auto Photo Fine
|
Prints enhanced images. Printing takes longer, but print quality is better.
|
|
None
|
Uses no automatic correction.
|
Enhance Resolution
If you are printing low-resolution images, or images that contain digital noise, use this setting.
- Press the Menu button, then press the bottom left button (next to Resolution) until you see Enhance Res. on the screen.
- Press OK. Then press the bottom left button to choose from these settings:
|
Setting
|
Results
|
|
On
|
Removes digital noise in photos and enhances the resolution of low-resolution images.
|
|
Off
|
Does not remove digital noise or enhance resolution.
|
Brightness
- Press the Menu button, then press the bottom left button (next to Resolution) until you see Brightness on the screen.
- Press OK. Then press the bottom left button to choose from these settings:
|
Setting
|
Results
|
|
Brightest
|
Makes printouts very bright.
|
|
Brighter
|
Makes printouts slightly brighter.
|
|
Standard
|
Does not adjust brightness.
|
|
Darker
|
Makes printouts slightly darker.
|
|
Darkest
|
Makes printouts very dark.
|
Contrast
- Press the Menu button, then press the bottom left button (next to Resolution) until you see Contrast on the screen.
- Press OK. Then press the bottom left button to choose from these settings:
|
Setting
|
Results
|
|
Super Hi
|
Prints with very high contrast.
|
|
Hi
|
Prints with slightly enhanced contrast.
|
|
Off
|
Makes no contrast adjustment.
|
Sharpness
- Press the Menu button, then press the bottom left button (next to Resolution) until you see Sharpness on the screen.
- Press OK. Then press the bottom left button to choose from these settings:
|
Setting
|
Results
|
|
Sharpest
|
Makes the outline of objects very sharp.
|
|
Sharper
|
Makes the outline of objects slightly sharper.
|
|
Standard
|
Makes no sharpness adjustment.
|
|
Softer
|
Makes the outline of objects slightly softer.
|
|
Softest
|
Makes the outline of objects very soft.
|
Saturation
- Press the Menu button, then press the bottom left button (next to Resolution) until you see Saturation on the screen.
- Press OK. Then press the bottom left button to choose from these settings:
|
Setting
|
Results
|
|
Most
|
Makes printouts very vivid.
|
|
More
|
Makes printouts slightly more vivid.
|
|
Standard
|
Makes no saturation adjustment.
|
|
Less
|
Makes printouts slightly less vivid.
|
|
Least
|
Makes printouts very dull.
|
Date
- Press the Menu button, then press the bottom left button (next to Resolution) until you see Date on the screen.
- Press OK. Then press the bottom left button to choose from these settings:
|
Setting
|
Results
|
|
None
|
Prints with no date information.
|
|
yyyy.mm.dd
|
Prints a date in the following format: 2003.09.08
|
|
mm.dd.yyyy
|
Prints a date in the following format: 09.08.2003
|
|
dd.mm.yyyy
|
Prints a date in the following format: 08.09.2003
|
Time
- Press the Menu button, then press the bottom left button (next to Resolution) until you see Time on the screen.
- Press OK. Then press the bottom left button to choose from these settings:
|
Setting
|
Results
|
|
None
|
Prints with no time information.
|
|
12-hour system
|
Prints the time using the 12-hour system (for example, 10:00)
|
|
24-hour system
|
Prints the time using the 24-hour system (for example, 22:00)
|
Print Information
By turning this function on, you can print information about each of your digital images, such as exposure time, shutter speed, F number, and ISO rate. You can only print this information if your images comply with the Exif standard.
- Press the Menu button, then press the bottom left button (next to Resolution) until you see Print Info on the screen.
- Press OK. Then press the bottom left button to choose from these settings:
|
Setting
|
Results
|
|
Off
|
Prints with no information.
|
|
On
|
Prints with information in the bottom right corner of the printout.
|
Fit to Frame
- Press the Menu button, then press the bottom left button (next to Resolution) until you see Fit to Frame on the screen.
- Press OK. Then press the bottom left button to choose from these settings:
|
Setting
|
Results
|
|
On
|
Automatically trims your image to fit the print size selected.
|
|
Off
|
Does not trim the image.
|
Hi Speed
This setting allows you to perform bidirectional printing for greater speed.
- Press the Menu button, then press the bottom left button (next to Resolution) until you see Hi Speedon the screen.
- Press OK. Then press the bottom left button to choose from these settings:
|
Setting
|
Results
|
|
On
|
Increases print speed.
|
|
Off
|
Bidirectional printing is not enabled, so printing is slower.
|