You can load
paper up to this size in the lower paper cassette: Legal (8.5 × 14 inches
[216 × 356 mm]).
Note: Do not
remove or insert the paper cassette during printing.
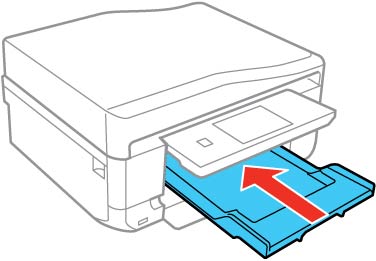
- Raise the control panel, if necessary.
- Close the output tray by selecting
 Output
Tray or by hand, if necessary.
Output
Tray or by hand, if necessary.
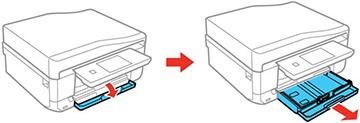
- Open the front cover and pull on it to remove the lower cassette.
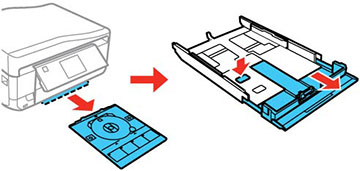
- Slide the edge guides outward.
Note: If you are using legal-size paper, remove the CD/DVD tray from the bottom of the lower cassette. Press the button on the lower cassette and then extend it as shown.
- Set the front edge guide to the paper size you are using.
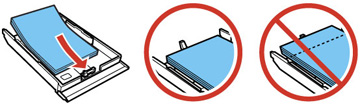
- Insert paper with the glossy or printable side
facedown.
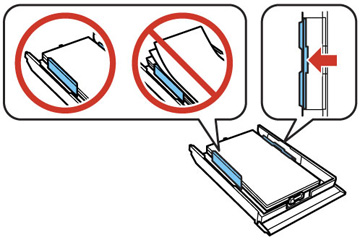
Note: Make sure the paper is loaded against the edge guide and not sticking out from the end of the cassette.
- Slide the side edge guides against the paper, but not too
tightly.
Note: Make sure the paper is under the tabs on the edge guides.
- Keep the cassette flat as you insert it.
- If prompted by the product's LCD screen, select the size
and type of the paper you loaded, and select Done.
Note: The output tray opens automatically when you print. Leave enough space in front of the product for the paper to be fully ejected.