You can load
one sheet of paper, card stock, or other thick media, or one
envelope in the rear paper feed slot.
Note: Paper
that is too stiff may not load correctly. Check the paper
specifications.
- Send your print job from a
computer or using the product's touch screen.
- If printing from a computer, select Rear Paper Feed Slot for the Source (Windows) or Paper Source (OS X) setting.
- If printing from the product's touch screen, select Rear Paper Feed Slot for the Paper Source setting.
- Do one of the following: You see a message on the LCD screen, then you see instructions for loading paper.
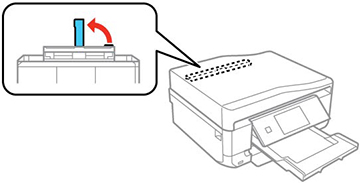
- Flip open the rear paper feed slot cover.
- Slide out the paper support.
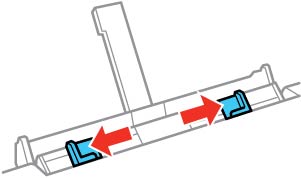
- Slide the edge guides outward.
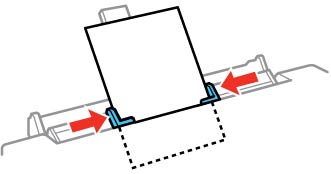
- Do one of the following:
- Load a single sheet of paper or thick media, printable side up and short edge first, in the center of the rear paper feed slot. Push it approximately 2 inches (5 cm) into the slot.
- Load an envelope, short edge first with the flap facing down and to the left, in the center of the rear paper feed slot. Push it approximately 2 inches (5 cm) into the slot.
- Load a sheet of loose-leaf or other paper with holes as shown, and push it approximately 2 inches (5 cm) into the slot.
- Slide the edge guides against the paper or envelope, but not too tightly.
- When you are ready to print, press the
 Start button.
Note: The output tray opens automatically when you print. Leave enough space in front of the product for the paper to be fully ejected.
Start button.
Note: The output tray opens automatically when you print. Leave enough space in front of the product for the paper to be fully ejected.


Always follow
these loading guidelines:
- Load one sheet or envelope at a time.
- Load the paper or envelope short edge first and printable side faceup.
- Check the paper package for any additional loading instructions.
Note: If ink
smears when you print on thick paper, you can select the Thick
Paper setting to improve print quality.